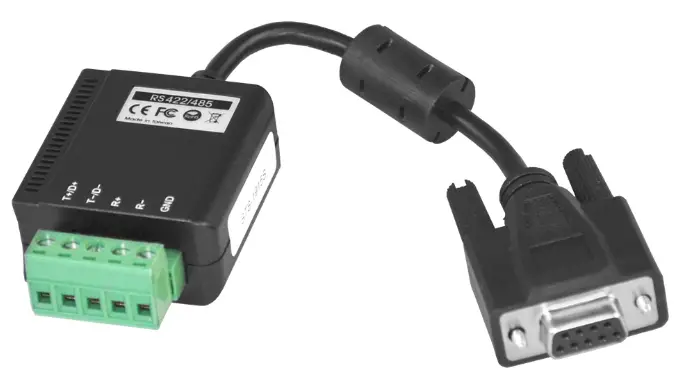
antaira RS232 to RS422/485 Converter with Surge Protection Port-Powered Installation Guide
- June 6, 2024
- antaira
Table of Contents
- antaira RS232 to RS422/485 Converter with Surge Protection Port-Powered
- Introduction
- Features
- Layout: RS232 to RS422/485 Converter
- Mode Switch Settings
- Installing the Converter
- 5-pin Terminator Block Pinouts and Cable Wiring
- Specifications
- Read User Manual Online (PDF format)
- Download This Manual (PDF format)
antaira RS232 to RS422/485 Converter with Surge Protection Port-Powered

Introduction
Thank you for purchasing this RS232 to RS422/485 Converter. It is designed for your PC, workstation, thin client, or server to provide instant RS422/485 serial port expansion via the standard RS232 port. It provides a DB9 female connector (DCE) that can be connected directly to your PC’s RS232 port. Its advanced power circuits can get the power from the standard RS232 signals. However, in case the RS232 cable is too long, or its power is too low, an external 5V DC power source can be applied to its input DC jack.
Features
- Supports a RS422/485 port over standard RS232 port
- 5-pin Terminal Block Supports RS422, RS485 4-wire 2-wire modes
- Optional model supports 2,500 Vrms Isolation and 500-watt Surge Protection
- Port-powered from RS232 lines, external power source supported, but not required in most cases
- Supports precise RS485 ATTATM (Auto Transceiver Turn Around) feature to disable the line driver by hardware
- Automatic Baud Rate Detection
- No Driver Required for All Operating Systems
Layout: RS232 to RS422/485 Converter

Mode Switch Settings
There are 4 switch pins on the DIP switch. Pin 1 to 3 (marked as S1 to S3)
were used to set the RS422 and RS485 modes. The 4th pin (marked as TERM ON) is
used to Enable (ON) or Disable(OFF) the termination resistor. 
Mode Settings
Termination Resistor Settings:
Installing the Converter
Since this converter supports RS232 port-powered feature, most of the cases you don’t need to connect any AC adapter on it. The internal circuits of the converter will convert the power from the RS232 signals. However, in the following cases you may need either an AC adapter or an USB-to-DC-Jack conversion cable to ensure it works normally:
- If the RS232 cable is too long to provide enough power
- Your converter is the Isolation and Surge Protection model, to supports this feature, you need more power for its internal circuits
- Your RS232 only provides 3 wires (TXD, RXD, GND) RS232 signals, then the power of its RS232 port is not enough
-
Use static electricity discharge precautions.
Remove possible static discharge potential from any objects that the converter may come in contact with before installation. This can be accomplished by touching a bare metal chassis rail after you have turned off the power. -
Locate an unused RS232 port (with DB9 male connector, configured as DTE), insert the DB9 female connector of the converter on it

-
Installing RS422/485 cable
Connect the RS422/485 cable from the converter’s Terminal Block connector to the RS422/485 devices. The mode can be set by the DIP switches next to the Terminal Block connector.
5-pin Terminator Block Pinouts and Cable Wiring

RS422 Cable Wiring: RS485 (2-wire) Cable Wiring:
Specifications
| Type | Specifications |
|---|
Connectors Number of Ports RS232 Signals RS422 Signals
RS485 Signals (2-wire) RS485 Signals (4-wire): Baud Rate
Power Requirement Operating Temperature Operating Humidity
Storage Temperature
| DB9 Female, 5-pin Terminal Block 1 RS422/485
TXD, RXD, RTS, CTS, DTR, DSR, DCD, GND TXD+, TXD-, RXD+, RXD-, GND
DATA+, DATA-, GND
TXD+, TXD-, RXD+, RXD-, GND
Automatic Baud Rate Detection 5V/30mA (RS232 line Powered) 0 to 60°C (32 to 140°F)
5 to 95% RH
-20 to 85°C (-4 to 185°F)
Read User Manual Online (PDF format)
Read User Manual Online (PDF format) >>