Sola Data Connector Instruction Manual
- June 2, 2024
- SOLA
Table of Contents
Sola Data Connector

Product Information
Specifications:
- Product Name: SOLA Data Connector
- Manufacturer: SOLA
- Website: www.sola.at
- Languages: English, German
- Requirements: .NET 7.0 Runtime
Product Usage Instructions
Installation Process:
Follow these steps to install the SOLA Data Connector:
- Download the .NET 7.0 Runtime from here.
- Select your desired language for the installation wizard (English or German).
- Open the file SOLADataConnector-[version].msi to start the installation process.
- Read and accept the Terms of Use.
- Choose the installation path and proceed with the installation.
- Complete the installation process and optionally open the application.
Starting the Application:
To start the program, go to the Start menu on your computer, search for
SOLADataConnector, and click on the entry to launch the application.
Device Window and Connection Process:
To connect to a device, follow these steps:
- Click on the SOLADataConnector icon in your computer system bar.
- Select a device from the list and click Connect to establish a connection.
Settings:
To configure key combinations for entries on the SOLA measuring device:
- You can set key combinations in the SOLA Data Connector to trigger specific actions on your computer when pressing buttons on the SOLA measuring device.
- In the Mode drop-down menu, choose between Length unit and Key combination.
FAQ:
-
Q: What languages are available for the installation wizard?
A: The installation wizard currently supports English and German languages. -
Q: How do I access the device window?
A: Click on the SOLADataConnector icon in your computer system bar to access the device window. -
Q: How can I configure key combinations for entries on the SOLA measuring device?
A: In the SOLA Data Connector settings, you can specify key combinations that trigger actions on your computer when using the SOLA measuring device.
About this Manual
Congratulations on your purchase of the SOLA Data Connector. You have acquired
SOLA application software that will make your work easier, more accurate and
faster.
These operating instructions will guide you step by step through the
installation process, showing you how to start the application and connect
your SOLA measuring device to it.
It also explains the various setting options in detail.
Follow the indications in these operating instructions to exploit the full
potential of the SOLA Data Connector and to make your workflows more
efficient.
Installation process
Download
-
Note
This application requires the installation of .NET 7.0 Runtime: https://dotnet.microsoft.com/en-us/download/dotnet/7.0 -
Languages
Select your desired language for the installation wizard. This is currently available in English and German. -
Starting the installation process
Follow the steps below to install the program:
1. Open the file “SOLADataConnector-[version].msi”. This starts the installation process.
2. Click the “Next” button to continue.
3. Read the Terms of Use carefully. By checking the box, you accept the Terms of Use and can then click “Next”. You can also open the Terms of Use directly in the application at any time
under “File”.
4. Now you can select the installation path. After that, click on “Next”.
5. You will be asked if you want to proceed with the installation. Click “Install” to start the installation.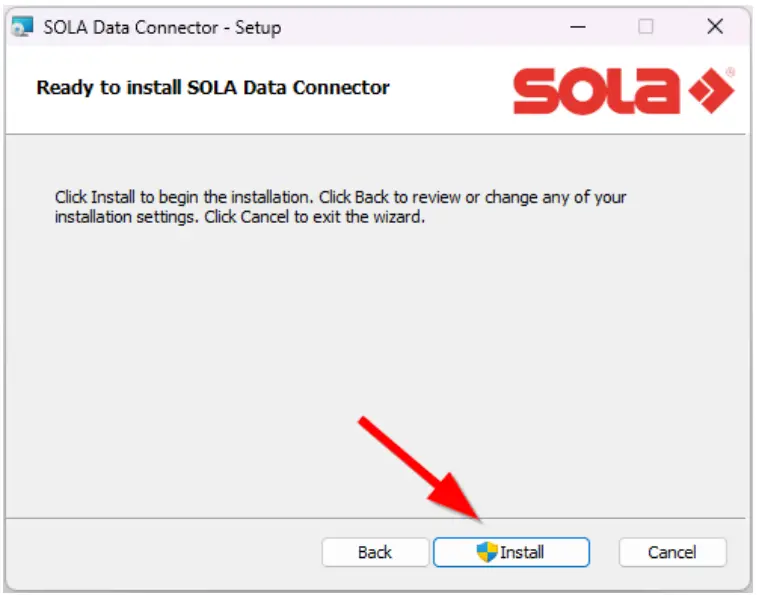
6. You will receive a message that the program has been successfully installed. Click “Finish” to complete the installation process. Here you also have the option to open the application after installation. After you complete these steps, the program is installed and ready to use
.
Starting the application
- Opening the program
Go to the Start menu of your computer and search for “SOLAData- Connector”. Click on the corresponding entry to start the program.
The device window and the connection process
-
Access
Access to the device window is gained by clicking on the SOLADataConnector icon in your computer system bar. The device window consists of a list view displaying devices that are currently sending Bluetooth Low Energy displays.
Follow these steps to connect to a device:
-
Access to the device window
-
Click on the SOLADataConnector icon in your computer system bar.
-
The device window opens and shows a list of devices currently sending Bluetooth LE displays.
-
Connection to a device
-
- Select a device from the list by clicking on it.
-
Click the “Connect” button to connect to the selected device.

Once connected, a message will be displayed in the message area indicating
that a device with a specific name is connected. Disconnection is done either
by connecting to another device in the list, or by turning off the device.
When a device is disconnected, a message is displayed in the message area
.
Automatic connection
When connecting to a device, the Bluetooth address for that device is stored
in the settings file. If the application is launched, and a Bluetooth address
is stored in the settings file, the application will continuously try to
connect to this device unless it connects to another device.
Note: If the PC enters standby mode, it may take up to 10 seconds to
restore the connection to the SOLA measuring device.
Settings
Configuring key combinations for entries on the SOLA measuring device
You can set key combinations in the SOLA Data Connector that trigger specific
actions on your computer when you press the buttons on the SOLA measuring
device. Each button on the SOLA measuring device can trigger its own key
combination. Two options are available in the “Mode” drop-down menu: “Length
unit” and “Key combination”.
Length unit mode
If you select the “Length unit” option, the input fields for “Button 2 key
combination” and “Button 3 key combination” are automatically hidden. In this
case, you have the option of changing the units (mm or cm) using the buttons
on your SOLA measuring device. You can select any key combination for “Button
1 key combination”.
- Click on the “Button 1 key combination” input field. This action deletes any previously determined key combination.
- Now enter your desired key combination. This may consist of a maximum of two keys. When you press the keys, the application recognizes them and displays them in the input field. Examples can be found on page 17.
Key combination mode
If you select the “Key combination” option, the input fields for “Button 2 key
combination” and “Button 3 key combination” are automatically hidden. You can
select any key combination for “Button 1 key combination”, “Button 2 key
combination” as well as “Button 3 key combination”.
- Click on the input field assigned to the key on the SOLA measuring device. This action deletes any previously determined key combination.
- Now enter your desired key combination. This may consist of a maximum of two keys. When you press the keys, the application recognizes them and displays them in the input field. Examples can be found on page 17.
Examples of possible key combinations
-
Enter
Adds a line break after entering the number. This is helpful in Microsoft Excel to confirm the entry and move to the next line. -
Tab
Inserts a tab step after the number is entered. This is helpful in Microsoft Excel for moving to the cell to the right after entering the number. -
Right (Right arrow key)
Moves the cursor/focus to the right. For example, this is helpful for navigating between cells with the SOLA measuring device after entering a number. -
Left (Left arrow key)
Moves the cursor/focus to the left. For example, this is helpful for navigating between cells with the SOLA measuring device after entering a number.
Specifying the decimal separator
- Click the input field for the decimal separator. This action deletes any previously determined character.
- Now enter your preferred character to display floating-point numbers in the input field provided. You can use any single character, such as “.” (dot), “,” (comma), or any other character of your choice, which the application will accept and display in the input field. However, if you leave the decimal separator input field empty, the application will automatically use the decimal separator according to your computer’s country settings.
Note: Depending on your choice of decimal separator, the measurement value may not be formatted as a number in Microsoft Excel due to regional format settings in Microsoft Windows.
Configuring the input delay
There is an input field in the configuration window for setting the input
delay.
- Click the input field for the input delay.
- Enter the desired delay time in milliseconds. For example, an entry of “1000” corresponds to a delay of one second.
Configuring the measurement unit conversion
The SOLA measuring device sends measurements in a specific unit, which can be
configured on the device. It is also possible for the measurement to be
converted to another length unit before the entry is sent. The settings window
provides a drop-down menu for this selection. The user can select one of the
following options: Do not convert (this means that the measurement is not
converted and is left as it is on the device), Centimeter, Millimeter, Inch,
Foot.
Language settings
You can change the language in the settings. To do so, select the desired
language from the displayed list. You have the choice between German (Deutsch)
and English. The application will now be displayed in the language you have
selected.
SOLA-Messwerkzeuge GmbH
Unteres Tobel 25
6840 Götzis, Austria
T +43 5523 53380-0
sola@sola.at
www.sola.at
SOLA-Messwerkzeuge GmbH & Co. KG
Heuriedweg 69
88131 Lindau, Germany
T +49 8382 28585
sola@sola.at
www.sola.de
SOLA Suisse AG
Grenzstrasse 24
9430 St. Margrethen, Switzerland
T +41 71 740 1616
info@solasuisse.ch
www.solasuisse.ch
References
- Sola Measuring Tools U.S.A.
- SOLA - der Spezialist für Messen und Markieren am Bau
- SOLA Suisse AG - der Spezialist für Messen und Markieren am Bau
- Download .NET 7.0 (Linux, macOS, and Windows)
Read User Manual Online (PDF format)
Read User Manual Online (PDF format) >>