allen roth WS62-1CH 1-Light Chrome Wall Sconce Instruction Manual
- June 2, 2024
- Allen+Roth
Table of Contents
allen roth WS62-1CH 1-Light Chrome Wall Sconce
Thank you for purchasing this allen + roth product. We’ve created these easy- to-follow instructions to ensure you spend your time enjoying the product instead of putting it together. But, if you need more information than what is provided here, please visit Lowes.com, search the item number and refer to the Guides & Documents tab on the product’s page.
Note: You must refer to the full manual online for the complete safety
information, care instructions, troubleshooting and warranty.
If the item is no longer for sale, or if you have any questions or problems,
please call our customer service department at
866-439-9800, 8 a.m. – 8 p.m., EST,
Monday – Sunday. You could also contact us at
partsplus@lowes.com.
HOUSEHOLD USE
THE PORTABLE LUMINAIRE IS CAPABLE OF BEING USED AS A FIXED LUMINAIRE WHEN INSTALLED IN ACCORDANCE WITH THE INSTRUCTIONS.
PREPARATION
Before beginning assembly of product, make sure all parts are present. Compare parts with package contents list and hardware contents list. If any part is missing or damaged, do not attempt to assemble the product.
Estimated Assembly Time: 30 – 40 minutes
TOOLS REQUIRED (NOT INCLUDED)

FEELING CONFIDENT? START YOUR NEXT PROJECT
- Visit lowes.com for more information.

SAFETY INFORMATION
CAUTION
- TURN OFF ELECTRICITY at circuit breaker box before beginning installation by switching the circuit breaker off.
- If you are not sure the lighting system has a grounding means, DO NOT attempt to install this fixture. Contact a qualified, licensed electrician for information regarding the proper grounding methods as required by the local electrical code in your area.
- All fixtures must be mounted to an outlet box that is supported by the building structure.
- If a dimmer control switch is used with this fixture, obtain professional advice to determine the correct type to use as well as the electrical rating required.
Please read and understand this entire manual before attempting to assemble, operate or install the product. Failure to do so could lead to electrical shock, fire or other injuries that could be fatal.
DANGER
- DO NOT connect this fixture to an electrical system that does not provide a means for equipment grounding. Never use a fixture in a two-wire system that is not grounded. Installing a fixture into an electrical system not having a proper grounding means could cause serious injury or death.
- DO NOT connect the bare or green insulation fixture ground wire to the black (HOT) current-carrying wire or the white (NEUTRAL) house wire. Connection of the bare or green fixture ground wire to the black or white house wires could cause serious injury or death.
- DO NOT damage or cut the wire insulation (covering) during installation of fixture. DO NOT permit wires to contact any surface having a sharp edge. To do so may could cause serious injury or death.
WARNING
- To avoid personal injury, gloves may be necessary while handling fixture parts with sharp edges.
- All electrical connections must be in agreement with local codes and ordinances, the National Electric Code (NEC) and ANSI/NFPA 70-1999. Contact your municipal building department to learn about your local codes, permits and/or inspections. Risk of fire – most dwellings built before 1985 have supply wire rated for 140 °F. Consult a qualified electrician before installation.
- DO NOT suspend any fixture by the house wires. A fixture must always be mounted directly to an outlet box or to a mounting plate which is first attached to the outlet box. Suspending a fixture by the house wires and wire connectors could result in the fixture falling, with the possibility of personal injury, electrical shock or fire.
- Always unplug this product before replacing bulbs.
- To reduce the risk of electric shock, DO NOT use the product if power cord is frayed or broken.
IMPORTANT SAFETY INFORMATION
WARNING
THIS PORTABLE LAMP HAS A POLARIZED PLUG (ONE BLADE IS WIDER THAN THE OTHER) AS A SAFETY FEATURE TO REDUCE THE RISK OF ELECTRIC SHOCK. THIS PLUG WILL FIT IN A POLARIZED OUTLET ONLY ONE WAY. IF IT DOES NOT FIT FULLY IN THE OUTLET, REVERSE THE PLUG. IF IT STILL DOES NOT FIT, CONTACT A QUALIFIED ELECTRICIAN. NEVER USE WITH AN EXTENSION CORD UNLESS THE PLUG CAN BE FULLY INSERTED. DO NOT ALTER THE PLUG.
- To reduce the risk of fire, electrical shock or personal injury, wire connectors provided with this light fixture are designed to accept only one 12-gauge house wire and two lead wires from the light fixture. If your house wire is larger than 12 gauge or there is more than one house wire to connect to the corresponding fixture lead wires, consult an electrician.
- DO NOT use bulbs having a wattage greater than the maximum value stated on the fixture. The use of bulbs with higher wattage than specified will increase temperatures and the risk of fire.
- When replacing the bulb, please allow the bulb to cool down before touching it.
- To reduce the risk of damage to the fixture, DO NOT use power tools to assemble any part of the fixture.
PACKAGE CONTENTS

HARDWARE CONTENTS
Note: Hardware shows actual size.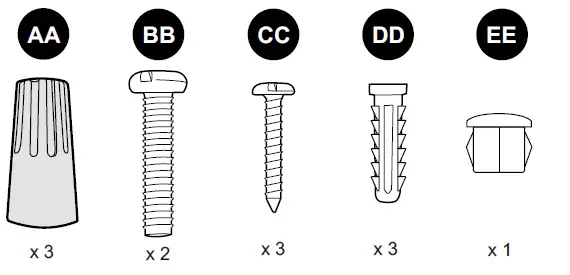
INSTALLATION OVERVIEW
- All fixture (A) drawings in this section are representational only; product may vary in appearance.
Save D for later use.
Guarde D para su uso posterior.
Choose a method for installation: PLUG-IN or HARDWIRE.
Note: For Plug-in Assembly, continue with Steps 3A – 7A; for Hardwire Assembly, go to Steps 3B – 6B in this section.
PLUG-IN ASSEMBLY Make sure ears are level horizontally
before tightening D.
Make sure ears are level horizontally
before tightening D.
Remove I from the cord. 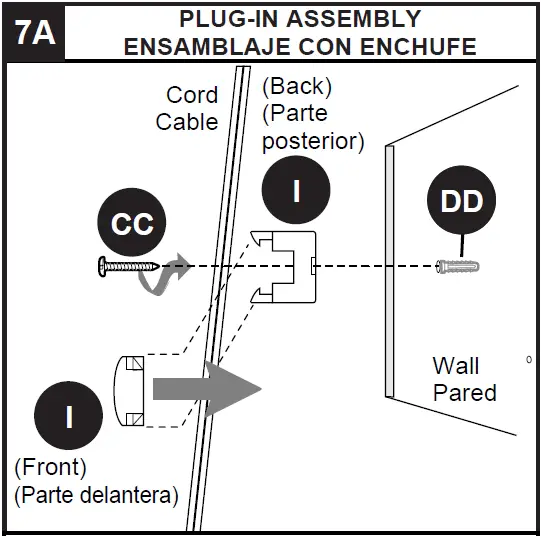
Using a 1/8 in. drill bit, drill a pilot hole. Continue to Step 7, this section.]
HARDWIRE ASSEMBLY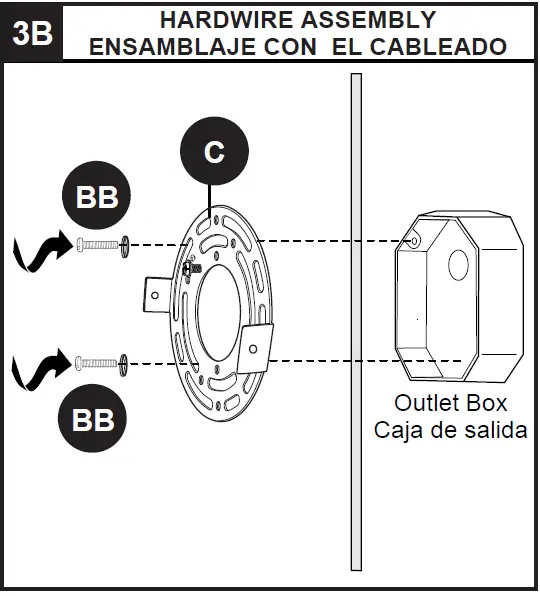

Remove plastic sleeve preassembled in A and, after removing cord, replace with EE.
Connect wiring: WHITE to WHITE, BLACK to BLACK, BARE/GREEN to BARE.
Note:
- Consult an electrician if wiring needs differ.
- Make sure no bare wire or wire strands are visible after making connections.
Before tightening D completely, use level (not included) to check A — adjust
if necessary. [Continue to Step 7.]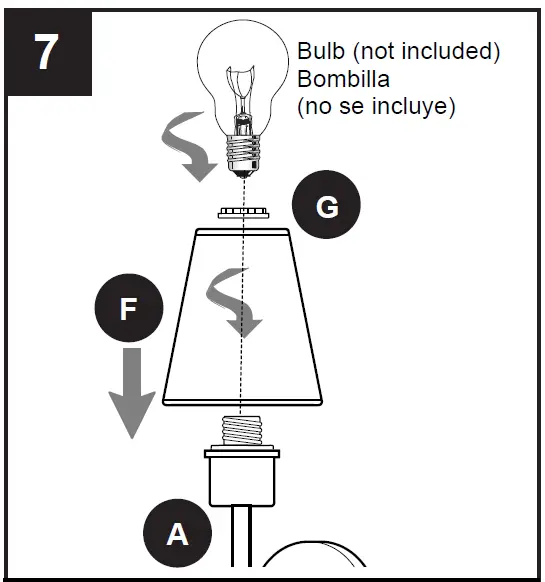
Use a 15-watt max. candelabra-base incandescent bulb or CFL/LED equivalent
.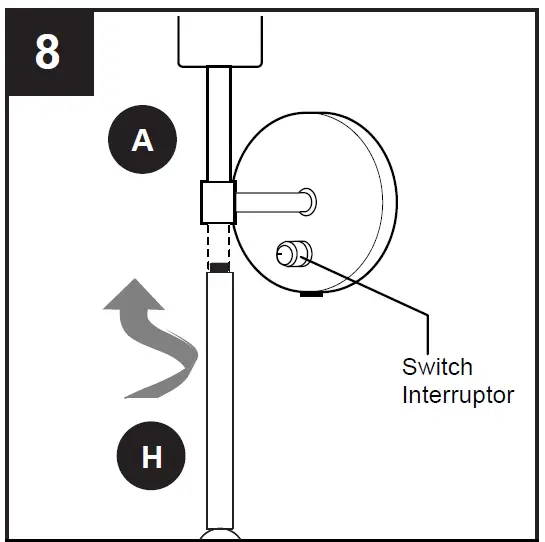
Use the preassembled switch on A to turn the light ON/OFF.
Read User Manual Online (PDF format)
Read User Manual Online (PDF format) >>