COGNEX Multi-Battery Charger User Guide
- June 6, 2024
- COGNEX
Table of Contents
- COGNEX Multi-Battery Charger
- Precautions
- About Multi-Battery Charger
- Dimensions
- Multi-Battery Charger Layout
- Connecting Power
- Charging Batteries
- Fast Charging
- Standard Charging
- Mounting
- Specifications
- Regulations/Conformity
- China RoHS
- Read User Manual Online (PDF format)
- Download This Manual (PDF format)

COGNEX Multi-Battery Charger

Precautions
To reduce the risk of injury or equipment damage, observe the following precautions when you install the Cognex product:
- This product is intended for industrial use in automated manufacturing or similar applications.
- The safety of any system incorporating this product is the responsibility of the assembler of the system.
- Do not install Cognex products where they are exposed to environmental hazards such as excessive heat, dust, moisture, humidity, impact, vibration, corrosive substances, flammable substances, or static electricity.
- Route cables and wires away from high-current wiring or high-voltage power sources to reduce the risk of damage or malfunction from the following causes: over-voltage, line noise, electrostatic discharge (ESD), power surges, or other irregularities in the power supply.
- This product does not contain user-serviceable parts. Do not make electrical or mechanical modifications to product components. Unauthorized modifications can void your warranty.
- Changes or modifications not expressly approved by the party responsible for regulatory compliance could void the user’s authority to operate the equipment.
- Include service loops with cable connections.
- Ensure that the cable bend radius begins at least six inches from the connector. Cable shielding can be degraded or cables can be damaged or wear out faster if a service loop or bend radius is tighter than 10X the cable diameter.
- This device should be used in accordance with the instructions in this manual.
- All specifications are for reference purposes only and can change without notice.
Symbols
The following symbols indicate safety precautions and supplemental information:
- WARNING: This symbol indicates a hazard that could cause death, serious personal injury or electrical shock.
- CAUTION: This symbol indicates a hazard that could result in property damage.
- Note: This symbol indicates additional information about a subject.
- Tip: This symbol indicates suggestions and shortcuts that might not otherwise be apparent.
About Multi-Battery Charger
Multi-Battery Charger is an accessory to the DataMan 8700 reader. The charger is capable of charging up to four DM8700 batteries1 simultaneously.
- Four independent charging paths that can operate separately or simultaneously
- Automatic connection detection for empty batteries
- Automatic charging cycle starts without user interaction
- Maximum charging time:
- Fast charging: 2.5 hours for DM8700 4500 mAh batteries
- Standard charging: 5 hours for DM8700 4500 mAh batteries
- Very robust industrial construction
- Resistant against vibration and drop
Dimensions


Multi-Battery Charger Layout
Layout
1| Mounting keyholes| 
2| M3 threaded inserts
3| Mounting keyholes
4| Rubber feet to prevent slipping
5| 24 V Screw Lock connector
6| 24 V Jack connector
7| Power indicator
8| Battery charging indicators
Connecting Power
To connect a power supply to the battery charger:
- Connect the 24 VDC power supply to the 24 V Jack connector.

- If you do not have a 24 VDC power supply with a Jack connector, first loosen the terminal locking screws, connect two wires to the 24V terminal block, and then secure the wires using the locking screws.

Note: Make sure that the device is oriented vertically. Do not mount the device at an angle.
Charging Batteries
Multi-Battery Charger has two charging modes:
- Fast charging
- Standard charging
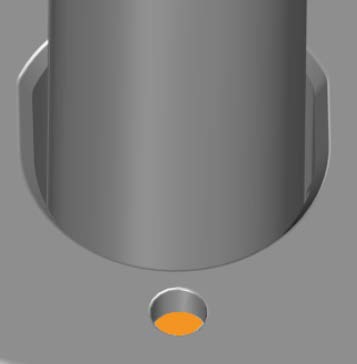
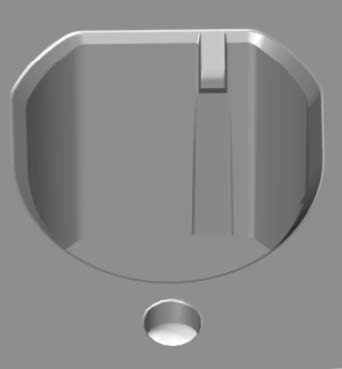
To initiate either of the charging modes, insert DM8700 battery into an empty
charging slot with the connector plates of the battery pointing
down.
Charging indicator color codes
| Color | Battery charging indicator | Status |
|---|---|---|
| RED |  | Fast charging | |
| ORANGE |  | Standard charging | |
| GREEN |  | Done charging | |
| OFF |  | No battery |
Fast Charging
Fast charging is only available in two slots, in the far right and left slots.
Note: If batteries are also inserted into the standard charging slots, fast charging is disabled, and only standard charging is possible, even in the fast charging slots.
- Place the batteries into either or both of the two fast charging slots. Up to two batteries can use fast charging at a time.

- Press down the battery until you hear the battery snap in place.
- If the charger is connected to a power source and the battery needs charging, the fast charging sequence starts automatically, indicated by red battery charging indicators. Fully charged batteries are indicated by green battery charger indicators.
- To remove a battery from the charger, simply pull out the battery from the charging slot.
Standard Charging
All slots are capable of standard charging, but the second and the third slots are only capable of standard charging.
- Insert one or more batteries into the empty charging slots with the connector plates of the batteries pointing down.
- Press down the battery until you hear the battery snap in place.
- If the charger is connected to a power source and the batteries need charging, the charging sequence starts automatically, indicated by orange battery charging indicators. Fully charged batteries are indicated by green battery charger indicators.
- To remove a battery from the charger, simply pull out the battery from the charging slot.
Examples for standard charging:

Mounting
When mounting the battery charger, leave at least 150 mm (5.9 inch) above the unit to allow batteries to be inserted and removed.

Use the mounting keyholes or the M3 threaded inserts to securely mount the
Multi-Battery Charger on a wall, or other flat, solid surfaces.
Make sure that the wires are not pinched or bent and the charger is not mounted in a corner.
Note: Make sure that the device is oriented vertically. Do not mount the device at an angle.
Specifications
Specifications
Weight| 180 g (without batteries)
Operating
Temperature
| 0°C – 45°C (32°F – 113°F)
Storage
Temperature
| -40°C – 60°C (-40°F – 140°F)
Maximum
Humidity
| 10 – 90% RH
Storage humidity| 10 – 95% RH
Environment
Standards:
| RoHS 2011/65/EU
WEEE Directive 2002/96/EC
Vibration Tolerance| 0.2’’ (5.1 mm) p-p from 5 Hz to 22 Hz Acceleration of 5 g
from 22 Hz to 300 Hz Environment temperature: 20 +/- 5°C
Drop Tolerance| Drops from 1m: 4 drops / 6 side. Total 24 drops. Without
battery.
Supported Batteries| DM8700 battery 4500 mAH
Power| input| • THT style 1.3/3.5 mm DC Jack
• 5 mm pitch Terminal Block Header – recommended wire diameter is 14-18 AWG
---|---|---
requirements| 24 VDC, min 1.0A
consumption| up to 24W
Functional Specifications| Charging four DM8700 battery simultaneously Battery
charge:10~ +45°C (Standard Charge)
0~10°C, 45~60°C (JEITA Charging) Battery discharge:-20~ +60°C
Charging slots:
– 2pcs fast charging slot with 2.5 A charger current
– or 4 pcs normal charging slot with 1.25 A charger current One battery charging time:
– fast charging slot: 2.5 hours
– normal charging slot: 5 hours
Regulations/Conformity
Note: For the most current CE declaration and regulatory conformity information, see the Cognex support site: cognex.com/support
Safety and Regulatory
Manufacturer| SINBON
No. 582, Kuo Hwa Road, Miaoli 360, Taiwan
Designer| Cognex Corporation One Vision Drive Natick, MA 01760 USA
|
This is a class A product. In a domestic environment this product may cause radio interference in which case the user may be required to take immediate measures. This equipment complies with the essential requirements of the EU Directive 2014/30/EU. Declarations are available from your local representative.
EU RoHS| Compliant to the most recent applicable directive.
FCC| FCC Part 15, Class A
This equipment has been tested and found to comply with the limits for a Class A digital device, pursuant to part 15 of the FCC Rules. These limits are designed to provide reasonable protection against harmful interference when the equipment is operated in a commercial environment. This equipment generates, uses, and can radiate radio frequency energy and, if not installed and used in accordance with the instruction manual, may cause harmful interference to radio communications. Operation of this equipment in a residential area is likely to cause harmful interference in which case the user will be required to correct the interference at his own expense.
Korea|
NRTL| TÜV RH AM SCC/NRTL OSHA Scheme for UL/CAN 62368-1.
CB| TÜV RH AM, IEC/EN 62368-1. CB report available upon request.
China RoHS
| Hazardous Substances 有 害 物 质 |
|---|
Part Name
部 件 名 称
| Lead (Pb)
铅
| Mercury (Hg)
汞
| Cadmium (Cd)
镉
| Hexavalent Chromium (Cr (VI))
六 价 铬
| Polybrominated biphenyls (PBB)
多 溴 联 苯
| Polybrominated diphenyl ethers (PBDE)
多 溴 二 苯 醚
Regulatory Model xxxx| X| O| O| O| O| O
This table is prepared in accordance with the provisions of SJ/T 11364.
这 个 标 签 是 根 据 SJ / T 11364 的 规 定 准 备 的 。
O: Indicates that said hazardous substance contained in all of the homogeneous materials for this part is below the limit requirement of GB / T26572 – 2011.
表 示 本 部 件 所 有 均 质 材 料 中 含 有 的 有 害 物 质 低 于 GB / T26572 – 2011 的 限 量 要 求 。
X: Indicates that said hazardous substance contained in at least one of the homogeneous materials used for this part is above the limit requirement of GB / T26572 – 2011.
表 示 用 于 本 部 件 的 至 少 一 种 均 质 材 料 中 所 含 的 危 害 物 质 超 过 GB / T26572 – 2011 的 限 制 要 求 。
For European Community Users
Cognex complies with Directive 2012/19/EU OF THE EUROPEAN PARLIAMENT AND OF
THE COUNCIL of 4 July 2012 on waste electrical and electronic equipment
(WEEE).
This product has required the extraction and use of natural resources for its
production. It may contain hazardous substances that could impact health and
the environment, if not properly disposed.
In order to avoid the dissemination of those substances in our environment and
to diminish the pressure on the natural resources, we encourage you to use the
appropriate take-back systems for product disposal. Those systems will reuse
or recycle most of the materials of the product you are disposing in a sound
way.
The crossed out wheeled bin symbol informs you that the product should not be
disposed of along with municipal waste and invites you to use the appropriate
separate take-back systems for product disposal.
If you need more information on the collection, reuse, and recycling systems,
please contact your local or regional waste administration.
You may also contact your supplier for more information on the environmental
performance of this product.
Copyright © 2020
Cognex Corporation. All Rights Reserved.
Read User Manual Online (PDF format)
Read User Manual Online (PDF format) >>