tp-link Smart IP Camera with Battery User Guide
- June 7, 2024
- tp-link
Table of Contents
- 1. Packing list
- 2.Product Details
- 4. Add Camera to APP
- 5.Device Menu
- 6. Share Video to Friend
- 7. Alarm Push Notification and playback
- 8. Camera Installation
- [
- 9. To reduce false alarms, please note that:
- 10. Feedback in Cloudedge App
- Read User Manual Online (PDF format)
- Download This Manual (PDF format)
tp-link Smart IP Camera with
_ **Battery User Guide**_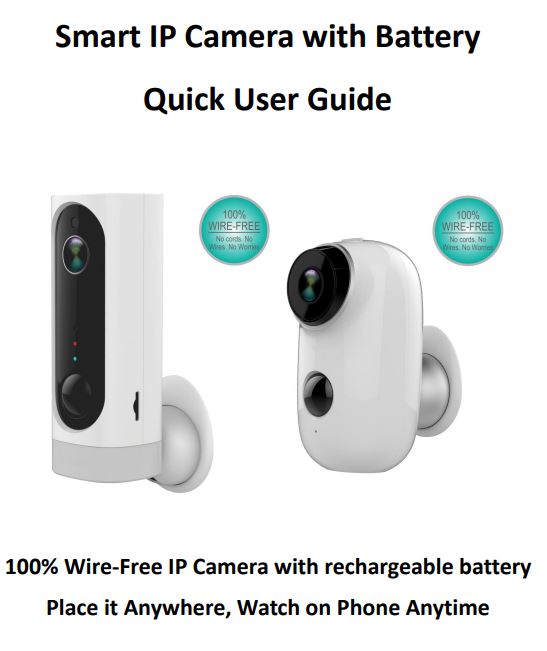
 https://itunes.apple.com/app/id1294635090?mt=8
 https://play.google.com/store/apps/details?id=com.cloudedge.smarteye
1. Packing list
A1 Camera
What is in the Box?

1x camera,
1x wall mount,
1x screws,
1x USB cable,
1x Quick User Guide
A3 Camera
What is in the Box?

1x camera,
1x wall mount,
1x screws,
1x Double-sided adhesive,
1x USB cable,
1x Quick User Guide
2.Product Details
Model: A1

Model A3:

3. Install Cloudedge APP
3.1 Search “Cloudedge”
in App store or google play store, or scan below QR Code to download and install on smart phone.
NOTE: Please allow below 2 permissions when first running App.
1. Allow CloudEdge use mobile cellular data and wireless LAN (Function: If
not allowed, it will be failed to add IP camera).
2.Allow CloudEdge to get system push message permissions (Function: When the
camera triggers motion detection or audible alarm, the phone can receive alarm
push).

3.2 Register Account:
New users need to register by e-mail, click “Register”, follow the steps to complete the registration of the account, and log in.
4. Add Camera to APP
4.1 Insert micro SD card
Please insert a micro SD card to record videos when motion detected and playback. ( card not included, supports 128GB Max.)
- NOTE: Please insert the SD card before power on, otherwise, the SD Card cannot be read.
4.2 Power on the camera
Press and hold on the top Power Button for 5 seconds to Turn on Camera (if can not power on, please plug in DC5V 1A/2A phone adapter to charge 15min first). Power adapter is not included in packing list.

NOTE: Ensure the indicator light slowly blinking in RED before setup WIFI
4.3 Setup Wi-Fi
4.3.1 Bring the camera and phone to the router within 1 to 3 feet (30
to 100 cm) and connect wife.

NOTE: Please note camera only works under 2.4G Wi-Fi, not supports 5G Wi-Fi.
4.3.2 Run CloudEdge App,
Click and select “BATTERY CAMERA”.
4.3.3 Select “The device has flashed red slowly or you hear a tone”,
tap NEXT
4.3.4 Select 2.4Ghz WIFI SSID and input password, tap NEXT
4.3.5 Put the QR code in front the camera lens 15cm.
The device lens is aimed at the QR code on the phone screen with a distance of 15 cm. After the device recognizes the QR code, it will sound “bugs” , if heard it, then tap “Hear Tone”.

4.3.6 After clicking
“Hear tone” , camera will start connecting wife and skip to “Search to Device” page after setup finished, you can edit camera name here , then click “DONE” to open camera in My Device list, now you can watch real-time video.

5.Device Menu


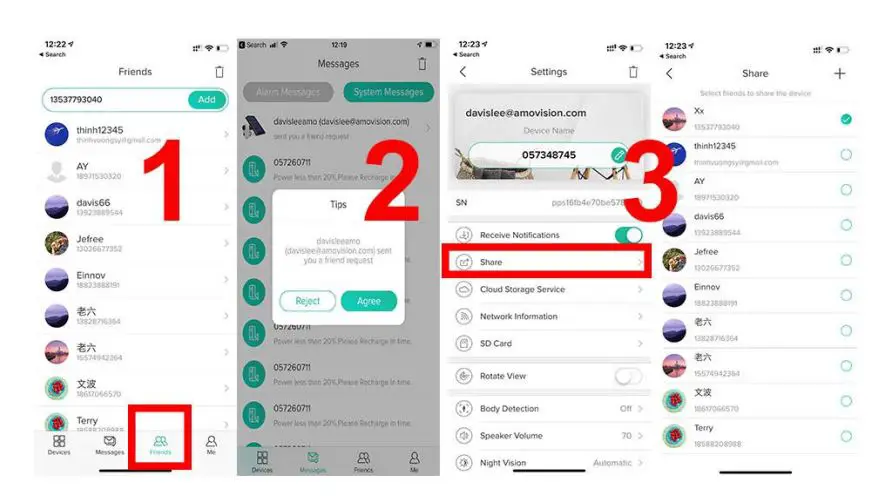
6. Share Video to Friend
6.1. Add your Friend’s account in app
NOTE: Firstly ensure Friend’s account already registered in Cloudedge app
6.2 Friend Agree to add request
6.3 Share video to your Friend’s account
7. Alarm Push Notification and playback
Battery camera with PIR sensor is not designed for 7X24 all day recording, but just push alarm message notification to phone app and record video to SD card when PIR sensor detected human body motion events, then you can playback the motion videos wherever you are via CloudEdge App.
When PIR is triggered, camera and system actions:
1. Alarm Sound in app
NOTE: please enable CloudEdge app notification in mobile setting and also
mobile volume is on
2. Alarm Message Notification
NOTE: please enable CloudEdge app notification in mobile setting
3. Alarm snapshot and video record on SD card
NOTE: please insert TF Card before power on camera

8. Camera Installation
8.1. You can put it on any flat place: table, chair, floor, etc.
8.2 Install with Wall Mount:
8.2.1 A3 Wall Mount Installation
Fix the iron ball bracket to the wall with screws or double-sided adhesive,
and then magnetize the camera to the iron ball. Installation is very
convenient and also easy
to adjust the angle.

8.2.2 A1 Wall Mount Installation

Steps1: Prepare one more cross screwdriver, which is not in packing list
Steps2: Use the screwdriver to thread the screw through the 90-degree notch of
the iron ball bracket
Steps3: Screw the screw into the threaded hole at the rear of the camera. The
90 degree slot can adjust the camera’s monitoring angle.
Steps4: Screw a screw into the wall and hang the camera on the wall with the
iron ball bracket.
9. To reduce false alarms, please note that:
- Do not install the camera facing any objects with bright lights, including sunshine, bright lamp lights, etc.
- Do not place the camera too close to a place where there frequently moving vehicles. Based on numerous tests, the recommended distance between the camera and vehicle is 15 meters (55ft).
- Stay away from the outlets, including air conditioner vents, humidifier outlets, the heat transfer vents of the projectors, etc.
- Do not install the camera facing the mirror.
- Keep the camera at least 1 meter away from any wireless devices, including Wi-Fi routers and phones, in order to avoid wireless interference.
10. Feedback in Cloudedge App
Select “Me”–“Help & Feedback”–“Feedback”
In order to solve the problem effectively, please submit the question in the
feedback column. Follow the guide on App, please do as below steps:
- Please attached a photo of your device label
- Please input the S/N number of the device
- Please select the indicator status
- Question Description
- Please describe the problem in details
- Contact information

After you submitted the problem, we will get it in our Email, we will reply and solve the problem asap.
Appendix:
LED Status Description

Trouble Shooting Sheet

FAQ:
- IP camera not supports PC browser and Software.
- IP Camera not supports 5G WIFI
- Video playback only works in Cloudedge app, not supports 3rd party player.
- Manually snapshot and recording saved in mobile; events snapshot saved in cloud, events recordings saved in SD Card.
- IP Camera battery charge supports DC5V 1A/2A plug. 6000mA battery fully charged time: 8 hours/4hous if used DC5V 1A/2A power adapter.
- How to talk to camera or listen from the camera? Hold the Intercom key to talk, and enable the audio key on then you can listen from the camera.
- How to delete the photos and videos? Select “Me”—-“Pictures & Video”—-Selected—Delete
- How to get the SN number of the IP Camera? Please follow 2 pictures: Camera Settings—- SN Number

Read User Manual Online (PDF format)
Read User Manual Online (PDF format) >>