SHEN ZHEN GUO WEI NETWORK SERVICE LIMITED M1 SmartLCD Projector User Manual
- June 12, 2024
- SHEN ZHEN GUO WEI NETWORK SERVICE LIMITED
Table of Contents
 M1
M1
SmartLCD Projector Manual
Product Precautions
- Please read this manual carefully before.
- In order to ensure the stability of power supply of this machine, please use the power supply line conforming to the national power consumption standard and the power socket with grounding and other protection measures.
- Please use the power supply type indicated on the projector for power supply.
- Please do not open and dismantle the machine by yourself, otherwise our company will not undertake free warranty service.
- Please do not look directly at the projector lens when the projector is working, so as not to hurt your eyes.
- Please do not place the projector on articles that may block the vents, such as cloth and blankets.
- This product does not have waterproof function, so water sprinkling or splashing should be avoided, and vases, cups and other items containing liquid should not be placed next to the product.
- In order to prevent electric shock,remember not to make this machine rain or water injected into it.
- If you don’t use this product for a long time, please unplug the power cord.
- When transporting this product, please use the original foam of the machine.
- lf you find that the product is damaged, please do not try to repair it yourself,please contact the dealer.
- Please use itin an environment of 5-35C,and use it in an environmentbelow 2000Mabove sealevel.
Package Contents:
This product contains the following components,if there is any missing,please
contact the dealerimmediately.
Projector……………………….. 1pcs
Remote control……………… 1pcs
19VDC Adapter……………… 1pcs
Operating Manual…………. 1pcs
Product Introduction


- HDMI interface
- USB inte rface
- Audio
- 19V DC interface
- Inf ra red receiver window
- Air Inlet
- Lens
- Outlet
- Lens focusing ring
- On/off key
- Foot pad
- Support screw hole
Note: Please do not look directly at the camera, so as not to hurt your eyes!!!
Remote Control

1. On/Off
2. Mute
3. Volume-
4. Volume+
5. Menu
6. Up
7. Left
8. Right
9. Down| 10. OK
11. Return
12. Signal
13. Home
14. Trapezoid+
15. Trapezoid-
16. YouTube
17. Prime video
---|---
Connection
Warning: As a safety precaution, disconnect the projector and all connected device before connecting the cables
1.Turn on
Find the random standard adapter and remote control. Turn on the machine, turn
on the red light during the power-on process, press the machine body startup
key or the remote controller startup key, and then the indicator light goes
out. After the startup logo appears, it enters the system interface and the
machine starts to work.
2.lmage focusing/trapezoidal correction
① lmage focusing: After the projector is turned on, the main interface
appears. When the projected picture is not clear, adjust the lens focusing
ring until the projected picture is clear

② Trapezoidal correction: When the projector is put up or down, the electronic
trapezoidal correction function is needed to realize image normalization.
(1) Manual trapezoid correction: Move the cursor to Setting in the main
interface and open Setting-Projection Setting-Horizontal/Vertical Correction.
When the machine is projected up and down, you can use vertical trapezoidal
adjustment (press Up and Down) to correct the corresponding value to normal
picture. When the machine to the left or right projection, you can use the
horizontal trapezoidal adjustment (press Left and Right) to correct the
corresponding value to the normal picture

(2) Four-point trapezoid correction: Move the cursor to Setting in the main interface, and open Setting-Projection Setting-Four-corner trapezoid correction. (This function is needed when the machine tilts up and down, left and right directions at the same time). Four- point trapezoidal correction operation instructions: press OK to switch the four corners, and press the upper, lower, left and right direction keys to switch values after selection. After adjusting OK for one corner, press OK to switch to the next corner, repeat the above steps to adjust the four corners to be appropriate, and the picture is normal. (press Menu to reset)

3.Projector signal source inputselection
When the projector is connected with the external device interface, the
projector needs to use the remote controller to move to the corresponding
signal channel icon in the main interface, or press the channel selection key
to select the corresponding input channel for connection, such as HDMI,MEDIA,
etc.
After the machine is turned on, the cursor of the remote controller can be
moved to the corresponding position in the main interface, and the input
signal source can be entered by pressing the confirmation key or directly use
the remote controller to press the signal selection key to directly call out
the signal channel and select the HDMI channel to enter.
Press the confirm key to enter the corresponding channel. Exit the HDMI
channel and press the return key to return to the main interface

4. Projector connection setting
(1) connector and HDMI device Prepare an HDMI cabel with one end connected to
the HDMI interface of the projector and the other end connected to the
device(such as computer,HD player,DVD,etc.) and enter HDMI mode by pressing
the menu key.
(2) Connect USB flash drive After connecting the USB flash drive to the
machine, move the icon on the main interface until MEDIA opens.After entering
open video,audio, text, pictures and other files.
(3) Connect audio
After the machine is powered on to play audio and video, it is connected with
an external stereo or earphone to play sound

- Connect to HDMI
- Connect USB
- Connect audio
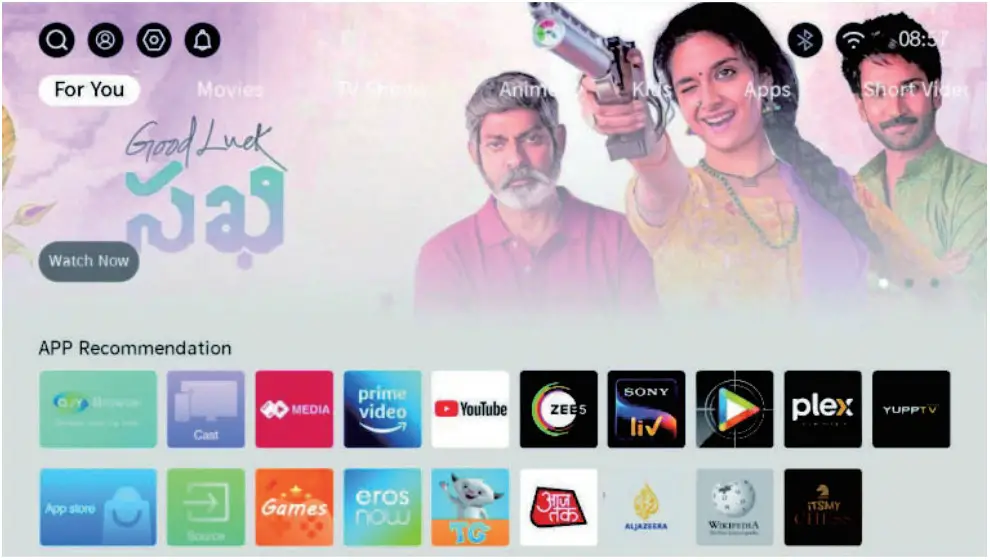
Introduction to the Main Functions ofthe system interface
1. Introduction
Press the On/Off to boot the projector, and enter the main interface after the
bootlogo appears for a few seconds.
2.Screen projection function
Android screen projection
- Select Cast software in the maininterface
- Select Android screen projection software
- Open mobile phone setting-wireless display-search for con nected devices-successful connection

Apple projection screen
- Select Cast software in the maininterface
- Connect the mobile phone and projection to the same network
- Open the shortcuttoolbar-screenimage-search connection Selectto open the iPhone screen projection software Connectthe device-the connection success

3. Local play back
After connecting USB flash drive to projector, use remote control to open
MEDIA, select local disk to open USB flash drive (all files such as video,
pictures, songs, etc.), select files to be opened, have icon selection boxes
around, then press OK to enter playing, and press Return key to exit.
The local player supports the following formats:
Video file – MPG, MPEG, MP4, MKV , AVI , ASS FLV
Audio file – Mp3, ASF
Picture file – JPEG, BMP, PNG, JPG
4.Os setting
»Setting
Move to the system setting by Left and Right, press Up, Down, Left and Right
to select the corresponding setting options, and press the OK to enter the
setting.

(1 )Network setting
- Select Settings → Network Settings→ WiFi switch: Select the WiFi network to be connected, press “OK” to enter the setting, the password input box will pop up, enter the password and press Enter key 1–1 to connect. After the connection is complete, exit the WLAN page.

- Bluetooth Setting
Choose Bluetooth speaker setting in the home screen: press OK button to open Bluetooth function, choose your device need to be paired (such as Bluetooth earphones or Bluetooth speakers), press BACK button to exit after device was paired, then choose projector speaker or Bluetooth speaker from sound out device setting.
(2) Projector setting
- Main interface selection setting → projection setting→ horizontal/vertical correction: press Up and Down to adjust the vertical trapezoidal value, and press Left and Right to adjust the horizontal trapezoidal value.
- Select Setting→ Projection Setting → Four Corners Correction on the main interface: keystone correction in all directions of the four corners.
- Select Setting→ Projection Setting→ Screen Zoom on the main interface: realize the overall zooming of the screen.
- Main interface selection setting → projection setting → projection mode: switch formal projection, formal rear projection, hoisting forward projection and hoisting rear projection.

(3) Image setting
Main interface selection setting→ image setting→ image mode (set the screen
color according to personal preference)

OSD Menu Setting
After the projector is externally connected with device, such as HDMI, press the menu key to call up the menu function, or enter the setting to adjust the image and sound. To make menu adjustment setting, follow these steps:
- Press the menu key to enter the OSD menu and then press the ◀ or ► key to select the menu to be set.
- Press ◀ or ► to move to the item to be adjusted, and press the OK to enter .
- Press ◀ or ► key to set parameters.
- Press the return key to save the parameters
| Item | Description |
|---|---|
| Image mode | Set image display mode (standard, bright, energy saving, video, |
sports, games, custom)
Color temperature| Adjust image display color temperature (Cool, Warm,
Standard, Custom)
Sound mode| Standard, Music, Video, Sports, Custom
Aspect ratio| Adjust the aspect ratio (only scan, video, 4:3/16:9)
Projection Size Distance Table
Projection size (inch)| Screen length (CM)| Screen width (CM)|
Lens-screen distance (CM)
---|---|---|---
40| 88.5| 50| 84
50| 112| 63| 108
60| 132| 74| 127
70| 157| 88| 148
80| 177| 100.| 168
90| 201| 113| 188
100| 224| 126| 210
Disclaimer: We reserve the right to modify the contents of this manual
without any prior notice.
Note: This product will continue to carry out software optimization,
which may bring some differences between OSD operation interface and manual
pictures, but it will not afect the normal realization of the functions
described in the manual. We apologize for the inconvenience caused to you, and
we will change the operation mode caused by the interface and some functions
without prior notice.
FCC Caution.
This device complies with part 15 of the FCC Rules. Operation is subject to
the following two conditions: (1) This device may not cause harmful
interference, and (2) this device must accept any interference received,
including interference that may cause undesired operation.
Any Changes or modifications not expressly approved by the party responsible
for compliance could void the user’s authority to operate the equipment.
Note: This equipment has been tested and found to comply with the limits
for a Class B digital device, pursuant to part 15 of the FCC Rules. These
limits are designed to provide reasonable protection against harmful
interference in a residential installation. This equipment generates uses and
can radiate radio frequency energy and, if not installed and used in
accordance with the instructions, may cause harmful interference to radio
communications. However, there is no guarantee that interference will not
occur in a particular installation. If this equipment does cause harmful
interference to radio or television reception, which can be determined by
turning the equipment off and on, the user is encouraged to try to correct the
interference by one or more of the following measures:
- Reorient or relocate the receiving antenna.
- Increase the separation between the equipment and receiver.
- Connect the equipment into an outlet on a circuit different from that to which the receiver is connected.
- Consult the dealer or an experienced radio/TV technician for help.
This equipment complies with FCC radiation exposure limits set forth for an uncontrolled environment.This equipment should be installed and operated with minimum distance 20cm between the radiator&your body.
![]() MADE IN CHINA
MADE IN CHINA
Documents / Resources
| SHEN
ZHEN GUO WEI NETWORK SERVICE LIMITED M1 SmartLCD
Projector
[pdf] User Manual
2BCIC-M1, 2BCICM1, M1, M1 SmartLCD Projector, SmartLCD Projector, Projector
---|---
Read User Manual Online (PDF format)
Read User Manual Online (PDF format) >>