Hetzer Design Innovations HDI33BLUE Smart-Tech Collar User Manual
- June 9, 2024
- Hetzer Design Innovations
Table of Contents
Design Innovations HDI33BLUE Smart-Tech Collar
User Manual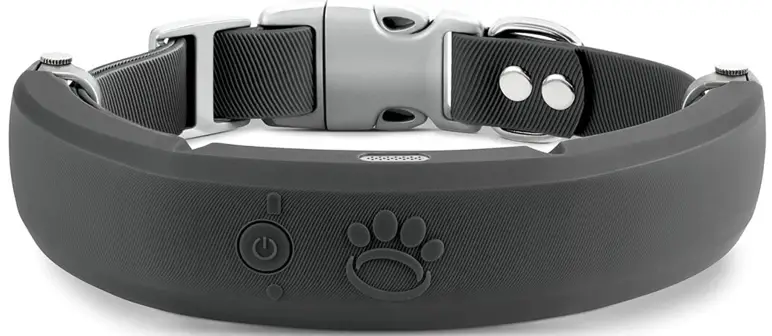
Leash Identification
The smart-teach collar comes with a receiver, nylon collar, charging cord, two
probe sizes, rubber probe covers, non-static blue pads, and static tester.

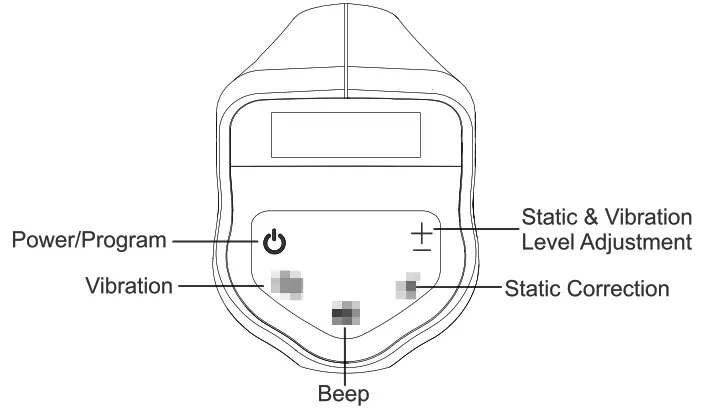
Button Identification
Display Identification

Power On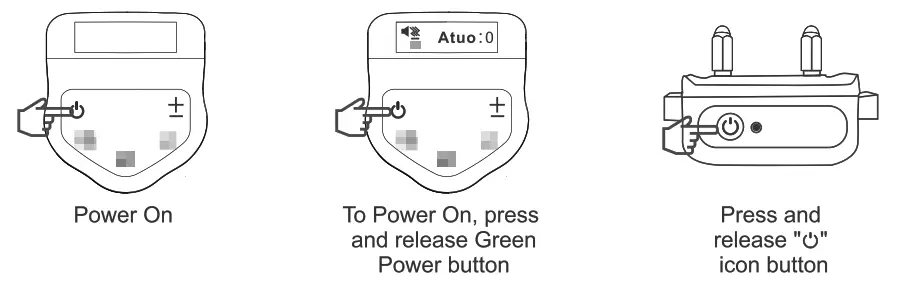
Double tap ‘ ” icon to check collar battery life:
5 Beeps = 100% 4 Beeps = 80% 3 Beeps = 60%
2 Beeps = 40% 1 Beep = 20%
Red light will flash 10 times
Indicating battery life too low = shutting down
Switch from Manual Mode to Auto Mode
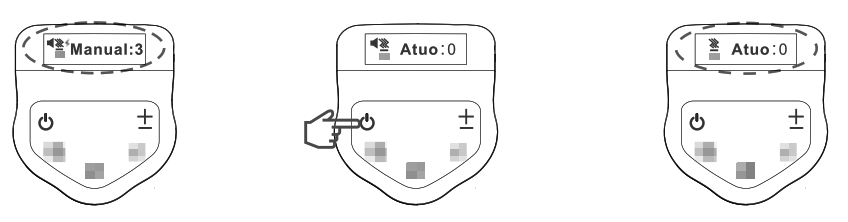 With Power ON, press and release Green
button once to switch from Manual to Auto. (Press again to switch back.)
With Power ON, press and release Green
button once to switch from Manual to Auto. (Press again to switch back.)
Auto Mode
Device will automatically send a “Beep” signal when dog pulls 2 lbs.
Device will automatically send a “Vibration” signal when dog pulls 4 lbs.
Device will automatically send a “Static Correction” signal when dog pulls 6
lbs.(With Static in “On” position)
Switch from Static Correction On to Static Off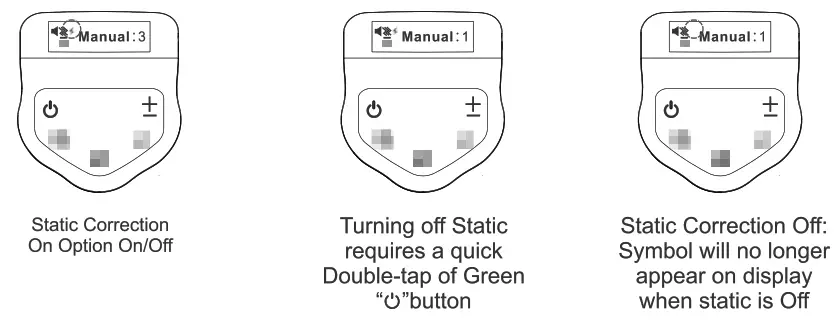 To tum Static on double-tap Green button
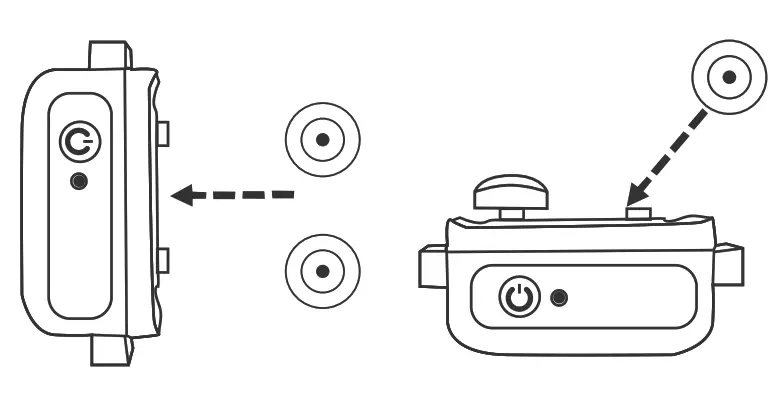
For non-static users, place the blue pads over the threaded probes. This will
eliminate any accidental corrections.
 For best results:
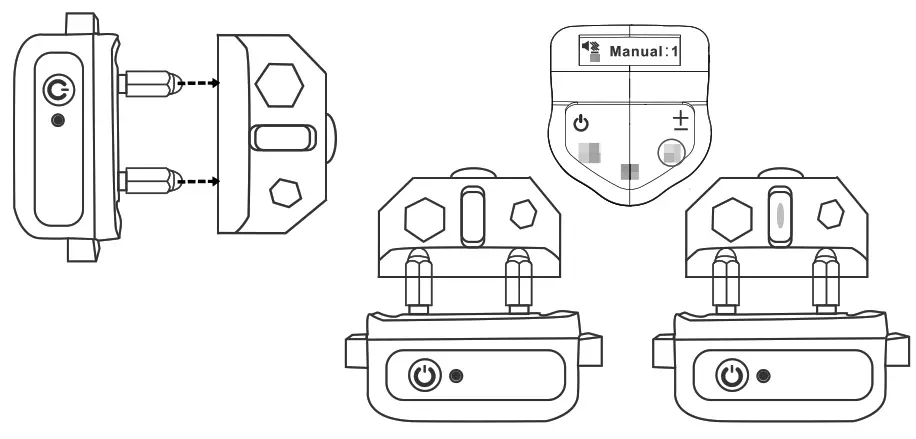
Use short probes for short haired dogs and long probes for long haired dogs.
 For static use, screw probe onto collar
and use the tester for a gentle snug tight fit.
For static use, screw probe onto collar
and use the tester for a gentle snug tight fit.
Place rubber protectors over probes for comfort.
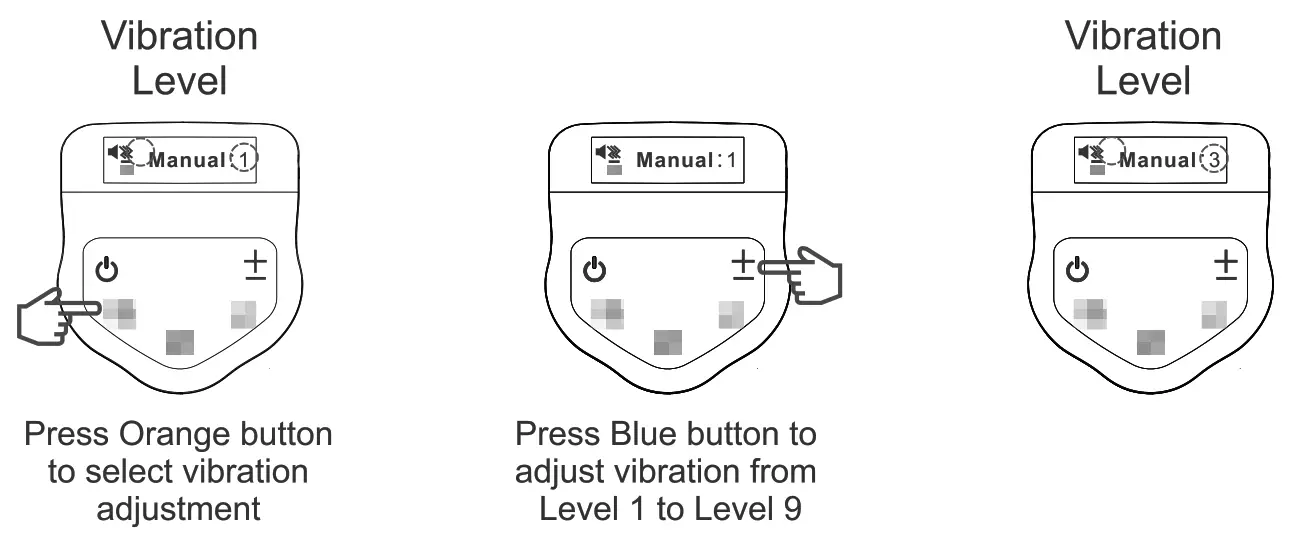
Adjust Vibration Levels (Manual Mode Only)
Adjust Static Correction Level (Manual Mode Only)
To adjust static level: Press Red button to begin program
To adjust static correction: Press blue button and adjust from Level 1 to
Level 9
To turn static mode On or Off: Double-tap green button Icon will appear when
static is On and disappear when static is Off.
WARNING: Static correction should never be used to punish your dog. It is
designed to get their attention and should always be followed by a verbal
command.
Always begin training on Level 1 and work up to a proper level in accordance
with your dog’s size and temperament.
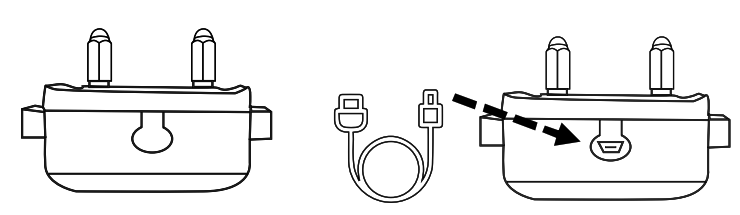
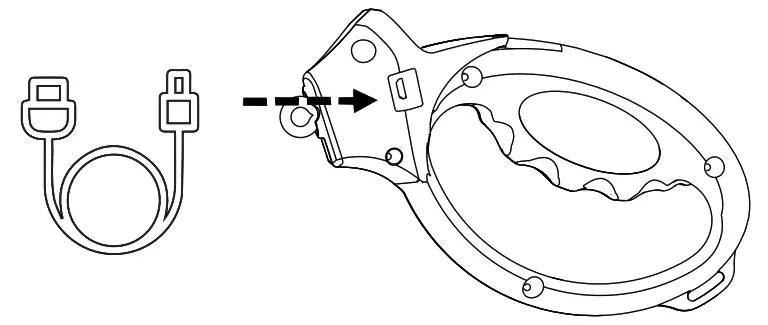 The USB charging port for the smart
leash handle can be found on the side as indicated in the photo.
The USB charging port for the smart
leash handle can be found on the side as indicated in the photo.
The USB charging port for the collar can be found on the bottom of the collar
by lifting the rubber tab.
 NOTE: Leash must be in manual mode
for testing.
NOTE: Leash must be in manual mode
for testing.
To test the static, place the tester on the probes making sure the wires in
the tester slots contact the probes. Then press and release the Red static
button. The tester will illuminate when working correctly.
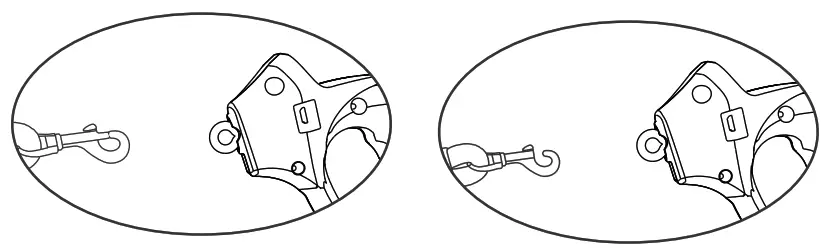
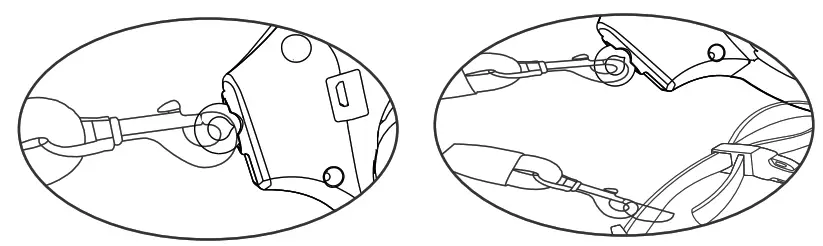
 We are now ready to attach the leash to
the collar and leash-handle by using your thumb to open connector and place on
collar and handle loop.
We are now ready to attach the leash to
the collar and leash-handle by using your thumb to open connector and place on
collar and handle loop.
 NOTE: Collar should be adjusted to
be snug but not tight around dog’s neck.
NOTE: Collar should be adjusted to
be snug but not tight around dog’s neck.
For best fit you should be able to slide one finger comfortably between collar
and your dog’s neck.
 You are ready to begin using Loyal
Leash. Please visit our instructional guides for training tips.
You are ready to begin using Loyal
Leash. Please visit our instructional guides for training tips.
FCC Caution
This device complies with part 15 of the FCC Rules. Operation is subject to
the following two conditions: (1) This device may not cause harmful
interference, and (2) this device must accept any interference received,
including interference that may cause undesired operation.
Any Changes or modifications not expressly approved by the party responsible
for compliance could void the user’s authority to operate the equipment.
Note: This equipment has been tested and found to comply with the limits
for a Class B digital device, pursuant to part 15 of the FCC Rules. These
limits are designed to provide reasonable protection against harmful
interference in a residential installation. This equipment generates uses and
can radiate radio frequency energy and, if not installed and used in
accordance with the instructions, may cause harmful interference to radio
communications. However, there is no guarantee that interference will not
occur in a particular installation. If this equipment does cause harmful
interference to radio or television reception, which can be determined by
turning the equipment off and on, the user is encouraged to try to correct the
interference by one or more of the following measures:
- Reorient or relocate the receiving antenna.
- Increase the separation between the equipment and receiver.
- Connect the equipment into an outlet on a circuit different from that to which the receiver is connected.
- Consult the dealer or an experienced radio/TV technician for help.
The device has been evaluated to meet general RF exposure requirement. The device can be used in portable exposure condition without restriction.
Read User Manual Online (PDF format)
Read User Manual Online (PDF format) >>