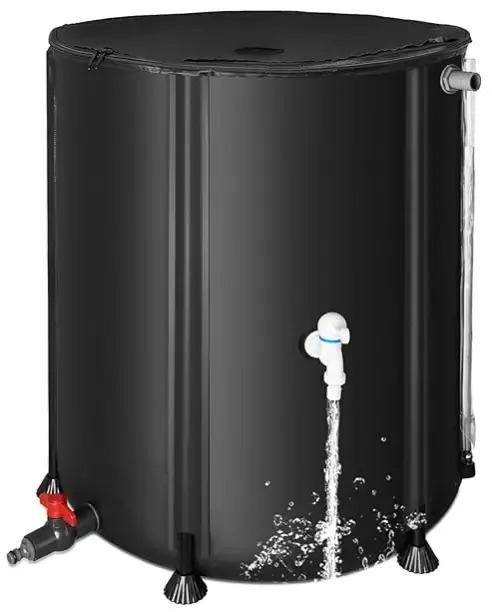
RAIN WATER Ivy BarrelIvy Rain Barrel 50 Gallon Instruction Manual
- June 15, 2024
- RAIN WATER
Table of Contents
Ivy BarrelIvy Rain Barrel 50 Gallon
Instruction Manual
Ivy BarrelIvy Rain Barrel 50 Gallon

Ivy Rain Barrel ® Installation Instructions
Please read all instructions before installing your rain barrel and retain
instructions for future reference. You can also watch our install video! Scan
the QR code to watch on YouTube.
The Ivy Rain Barrel ® is proudly made in the USA of the highest quality
materials available.
Installation Video:

What’s included:
- rain barrel (A)
- rain barrel lid (B)
- pre installed screen & ring (C)
- overflow cap (D)
- ball valve – spigot (E)
- re-usable zip ties (F)
- flex overflow hose (G)
- rubber washer (H)
What’s needed for installation:
- gloves and safety glasses
- blocks (K)*
- hack saw
- tape measure and marker
- screw driver
- downspout elbow (J)*
- not included
Step 1: Assemble the barrel.
- Insert the rubber washer (H) into threaded port at the bottom of the barrel. Thread the ball valve (E) using end with tighter thread pattern into same port. The small lever points away from the barrel when properly installed. Hand tighten, DO NOT over tighten with wrench or use tenon tape, this may damage seal.
- Attach lid (B) and secure with re-leasable zip ties (F).
- Connect overflow hose (G) to one overflow port. This will friction fit and does not require any additional fasteners. Pull gently on the overflow hose to expand and direct it away from your home’s foundation. Add the overflow cap (D) to opposite port.

Step 2: Choose a convenient downspout location. It is recommended to
elevate rain barrel using solid blocks and install on sturdy, level ground.
Block base must be larger than the bottom of the barrel.
Step 3: Measure blocks and assembled rain barrel, allow room for gutter elbow
(J) and mark the cut.
WARNING: Cold climates be aware that heated downspouts may cause
electrical shock. Call a professional before installing. Wearing safety
glasses and gloves use a hack saw to cut downspout.
Final Step: Place assembled rain barrel on blocks (K) and attach gutter
elbow to direct rainwater into screened inlet of lid. You are now ready to
start collecting and using your rainwater! This water is NONPOTABLE and
should never be consumed.
For more options on how set up and use your rain barrel, watch our YouTube
series at
youtube.com/@RainWaterSolutionsTV
Daisy chaining multiple rain barrels: Link two or more barrels so the
over flow will drain into the additional barrel(s).
Follow steps 1 and 2 to assemble the additional barrel and create a base close
to the first barrel.
The overflow hose has a small indented section (I) that can be cut using
scissors or utility knife and used to link multiple rain barrels by attaching
overflow section between 2 overflow ports. Link the second barrel to the first
barrel. Attach the second over flow hose to the second barrel and direct away
from the home’s foundation. You should have an extra over flow cap and length
of over flow hose left over from this set up.
Maintenance: Keep screened inlet clear of debris. In areas that have
large pollen counts, the rain barrel may develop a smell after pollen season.
If this happens, drain barrel and use soft bristle brush to clean out barrel
then re-install. Once a year completely drain the barrel and remove any
accumulated organic matter. Screen ring (C) pops out to clean or replace
screen.
Winterize: Winterize your barrel if temperatures get bellow freezing in
your area. Drain, disconnect and store in a dry area.
Warning:
To prevent the barrel from tipping over Make sure your block base is wider than the bottom of the rain barrel. Do not tip the barrel to get the water out. This can stress the base and cause leaking. Water from your rain barrel is NONPOTABLE and should never be consumed.
Warranty Registration:
Warranty: The Ivy Rain Barrel® is warranted for two years from date of
retail purchase against defects in material and workmanship, and is solely for
the benefit of the original consumer purchaser. (Retain your dated sales
receipt as proof of purchase).
COVERED: Replacement of defective parts and freight (Standard Ground) to
cover product return and delivery.
NOT COVERED: Damages caused by negligence, abuse, failure to perform
normal maintenance, failure to properly winterize or failure to adhere to
product instructions for use. Any other expense involving this product. This
Warranty shall not apply to any defect, malfunction or failure to conform with
the Warranty provisions if caused by damage (not resulting from defect or
malfunction) due to unreasonable use or accidental occurrence involving the
Purchaser. This includes CONSEQUENTIAL DAMAGES,
INCIDENTAL DAMAGES OR INCIDENTAL EXPENSES, INCLUDING DAMAGE TO PROPERTY and
INJURY TO PERSONS. SOME STATES DO NOT ALLOW THE EXCLUSION OR LIMITATION OF
INCIDENTAL OR CONSEQUENTIAL DAMAGES, SO THE ABOVE LIMITATION MAY NOT APPLY TO
YOU.
This Warranty gives you specific legal rights, which may vary from state to
state.
Request For Warranty:
Please email info@rainwatersolutions.com
and include proof of purchase, description of issue, and photo of the issue.
References
Read User Manual Online (PDF format)
Read User Manual Online (PDF format) >>