GLOSSWOOD Satin Finish Lining Boards Installation Guide
- October 27, 2023
- GLOSSWOOD
Table of Contents
 INSTALLATION AND MAINTENANCE GUIDE
SATIN FINISH
LINING BOARDS
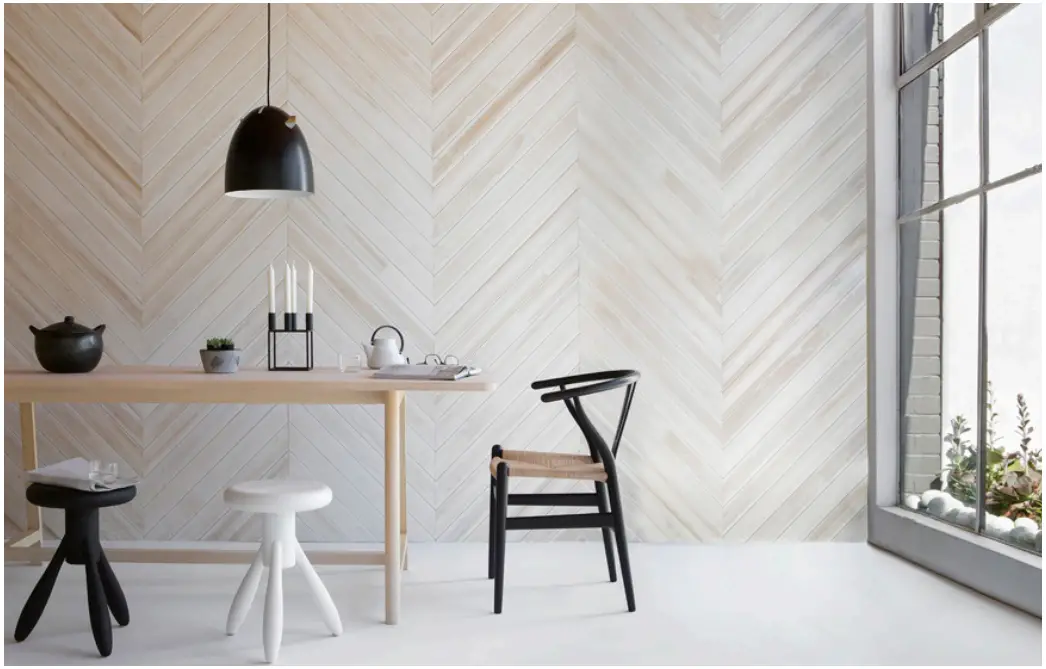 90mm Lining
Board in Distressed White Satin (installed in a custom chevron pattern)
90mm Lining
Board in Distressed White Satin (installed in a custom chevron pattern)
Satin Finish Lining Boards
INSTALLATION GUIDE
Carefully read this guide prior to installing Gloss wood Prefinished Timber
Lining Boards.
Building Codes of Practice must always be strictly observed for undercover
external timber installations. There is no warranty or guarantee offered for
damage to Glosswood caused by water or moisture, including damage caused due
to an incorrect installation procedure of a Glosswood Product, except as
required by law. Guarantees may not apply is these guidelines are not followed
-
INSPECTION OF EACH BOARD IS REQUIRED BEFORE INSTALL
Inspect the product on delivery and notify Glosswood within 7 days of any defect/damage, shortage in quantity or failure to comply with the description or quote. Damage can occur after despatch and in transport. Ensure that the packs received are the correct colour and finish that were ordered. Notify Glosswood as soon as reasonably possible if any other defect becomes evident; Glosswood must be able to have access to inspect the product. Timber is a natural product, so colour, shade, tone, texture, markings and grain may vary between boards and from samples provided. Visual inspection is necessary prior to installation to ensure you are satisfied with your purchase as there is no responsibility accepted by Glosswood once the product is installed. -
ACCLIMATISE THE BOARDS
Condition boards to room temperature and humidity by removing boards from packaging and stacking 150mm off floor on bearers not more than 450mm apart. Glosswood recommend a period of 2-3 days. Expose all surfaces to the installation environment.
NOTE: Acclimatising should not be undertaken during very wet or very dry periods of weather.
Tools Required:
-
USE CORRECT TOOLS & SAFETY PROCEDURES
Required tools: Set square, tape measure, spirit level, string line, fine- tooth circular saw, electric drill, brad gun, hand plane, hammer, nail punch, brads or panel pins (25-35mm-long wire nail), adhesive (Bostik HP or Ultra Set), caulking gun, sealer (See No 6), battens.
Health & Safety: Wear a dust mask, glasses and ear protection when using power tools and sawing. Persons attempting installation should have some natural aptitude or training. Methods described in this guide are not necessarily the only satisfactory procedures. -
PREPARE THE SURFACE
Boards can be fixed to a flat, straight surface such as rafters, joists, trusses, wall framing (stud walls) or battens attached to masonry walls (battens must be spaced 450mm apart). For existing walls and ceilings, Glosswood also recommends installing battens. -
PREPARE THE BOARDS
We supply the 3600mm boards over-length to allow for trimming of both ends when butt-joining. Each board must be freshly end-docked, which removes excess coating and machine marks on all board ends, face-cut on a clean 90-degree angle.
Glosswood also recommends under-cutting the butt-joint ends on a 3° degree angle, then resealing for a perfect closed finish between the butt-joints. To achieve a clean cut on a finished surface, use a multi-tooth blade and cut with the face of the board finished side up. -
END-SEAL THE SATIN BOARDS
It’s mandatory every end-joint or fresh cut is resealed. Ensure board ends are completely sealed to prevent moisture ingress.
Glosswood recommends using an end-sealer of a similar colour i.e. Bondall Monocel Gold Clear Timber Varnish. The other option is to use a bathroom/window Silicon Sealer in a matching colour to your board ends. End- seal and wipe face clean with a damp cloth if any sealant gets on the face of the board. Ensure all board ends are cut on a 3 degree angle to ensure a tight closure of the boards on the board face. Do not over-coat the face as it will alter appearance. -
USE POLYURETHANE ADHESIVE & WEAR GLOVES
Glosswood recommends using Bostik HP or Ultra Set. If using a similar adhesive product, refer to the manufacturers directions for use. One 600mm tube will cover 8-10sqm of battens. The adhesive acts as a primary fixing of the board to the ceiling/wall. Glosswood suggests using enough so that glue oozes out when the board is put in place. Wear disposable gloves while installing the boards to prevent glue, dirt and colour transfer. If hand and finger marks occur, refer to Maintenance & Care (below).
NOTE: Particular care needs to be given when installing the colour White, as it is more evident if glue and dirt is transfered onto this colour.
 Apply polyurethane adhesive to
batten/surface and place the lining board with the tongue facing outwards.
Apply polyurethane adhesive to
batten/surface and place the lining board with the tongue facing outwards. -
SECRET-NAIL THE BOARDS
Secret-nail the board through the tongue (nails are hidden by the groove of the next board) using a Brad gun and 25-35mm-long wire nails (also called brads). This will assist in clamping the board into position while the adhesive cures. Commence with the tongue facing outwards and nail at a 45° angle through the board near the base of the tongue (Refer to installation drawing). DO NOT face-nail the Glosswood boards (this will fracture the coating and could allow moisture in, which could cause delamination, and harbour mould and spores). Brad nail through the protuding
tongue of the board on a 45° degree angle.
Brad nail through the protuding
tongue of the board on a 45° degree angle. -
OFF-SET THE BOARDS AND LEAVE EXPANSION GAPS
Offset or stagger the boards to avoid board joints lining up in a row. Glosswood lining boards consist of two boards joined to provide the 3600mm set length. The minor lamination join appears approximately in the middle of the board and installers should stagger this line where possible. Check progressively with a spirit level to ensure a straight, level finish. Leave expansion gaps for natural timber expansion between the tongue and groove at approx.
2mm in thickness. Expansion varies depending on climate and application, but Glosswood recommends a minimum of every three to five boards. Expansion gaps are good practice for internal installation and essential for exterior applications (especially in moist and high-humidity locations, i.e. Queensland). Slide in the next lining board. Continue
with adhesive and nailing until you have lined the wall/ceiling.
Slide in the next lining board. Continue
with adhesive and nailing until you have lined the wall/ceiling. -
FIXING THE TRIM
Glosswood offers quad or coverstrip trims in the matching colour of the timber lining board. Glue or nail trims into place to cover the space expansion gaps left between wall and ceiling. When nailing Satin trims, use a bathroom/window Silicon Sealer in a matching colour to your board ends.
MAINTENANCE & CLEANING GUIDE
CLEANING THE SATIN BOARDS
Clean the Satin lining boards on a regular basis to remove dust, cobwebs and
sea salt residue. For Satin boards, Glosswood recommend a lint-free cloth for
cleaning. The accumulation of dirt and salt can dull the surface, as well as
store moisture and result in coating damage.
To clean or remove hand/finger marks, use a damp cloth (tightly wrung out) and
wipe the surface clean. Do not over saturate the cloth when cleaning. DO NOT
rub or use high-pressure sprays.
PERFORM REGULAR CHECKS
Inspect regularly for any potential change in appearance as this could
indicate water and moisture damage. If you notice any stains, colour changes,
peeling coatings and mould, take immediate precautions against ongoing damage.
If you observe any moisture on your lining boards, take immediate action to
stop ongoing exposure as damage will most likely occur after prolonged
moisture exposure.
MOULD ISSUES
Biocides are added to all our coatings to assist in combating mould growth.
However, surface mould may appear if moisture and air-borne mould spores are
present at your location. Moisture, dirt, dust, fly specks, insects and
biofilms (often caused by outdoor barbeques) provide nutrients that assist
mould spores to attach and multiply. Avoid this with regular maintenance and
cleaning. DO NOT use high-pressure spray units. Semi-tropical or mountainous
locations with excessive rain and 60%+ humidity are more prone to mould and
fungus, so be particularly vigilant in these regions. If you have a mould
issue, research online for non-solvent and non-abrasive cleaning methods for
your region.
REQUIRED READING
ACCEPTABLE CHARACTERISTICS
Glosswood embraces the natural variation of timber in colour, tone and grain;
Glosswood recommends blending packs as there may be tonal variation within
your consignment. Glosswood lining board ranges do have factory lamination
join lines approximately half-way on the board. The installer should stagger
this joint during the installation process to maintain design integrity.
MOISTURE CONTENT
Timber panelling is usually supplied at an average moisture content of 11-13%.
This moisture content suits coastal areas (i.e. Queensland) where the average
moisture content of internal timbers is about 12%. Where conditions are drier
(i.e. inland Queensland or airconditioned buildings), the average moisture
content is 8-12% which is why acclimatising the boards is important prior to
installation.
MOISTURE EXPOSURE
Glosswood Satin timber lining boards are sealed on all four sides with a Satin
coating. This superior coating helps to ensure greater stability of the
Glosswood product, but is not to be considered moisture-proofing. When
installing in a ceiling discuss with your builder or installer the use of a
waterproof membrane between the ceiling and your
roof, especially if it is a metal roof (these are prone to condensation in the
roof cavity).
Waterproof membrane insulation also assists in avoiding water damage caused by
roof and tile problems.
Do not install where water or moisture exposure may occur or could be
considered a problem, including pool and spa locations. Discuss application
with a qualified builder or similarly qualified person.
NOTE: Glosswod is not responsible for installer’s advice.
PREVAILING WEATHER
If designing a new outdoor area, consider ‘pitched roof end infills’, ‘barge
boards’, ‘external walls’ and/or ‘protective curtains’ to protect the boards
from prevailing weather. If retro-fitting, ensure the boards are installed in
a protected, undercover outdoor space. When installing in these applications,
always face the groove away from the direction of weather (i.e. groove faces
the house wall).
CODES OF PRACTICE
There is no warranty or guarantee offered for damage caused by water or
moisture exposure or due to lack of regular cleaning, including damage caused
by incorrect installation except as required by law. The use of chemicals or
high-pressure sprayers are not to be used in the cleaning process. Customers
must comply with these guidelines when installing and using Gloss wood, and
carry out cleaning on a regular basis.
Advice is of a general nature and does not take into account individual
circumstances. Check for updated installation information at:
www.glosswood.com.au
BOARD COVERAGE
When calculating quantities please keep in mind that a few millimetres are
lost in the tongue and groove between boards.
Refer to Board Coverage in the table below:
| BOARD WIDTH | BOARD COVERAGE |
|---|---|
| Lining Board: 90mm | 86mm |
| Lining Board: 130mm | 125mm |
| Designer Lining (single profile): 91mm | 81 mm |
| Designer Lining (double profile): 91mm | 81 mm |
| Form Series (Concave): 91 mm | 81 mm |
| Form Series (Round) 135mm | 130mm |
PROFILE DRAWINGS
NOT TO SCALE

90MM LINING BOARD| 130mm LINING BOARD

DESIGNER LINING (SINGLE)| DESIGNER LINING (DOUBLE)

FORM SERIES (CONCAVE)| FORM SERIES (ROUND)
All care has been taken in preparing instructions, however no responsibility for loss or accident, howsoever caused, is accepted.
This Guide is property of Glosswood and is not to be replicated.
info@glosswood.com.au
1300 882 064
This Guide is property of Glosswood and is not to be replicated.
References
Read User Manual Online (PDF format)
Read User Manual Online (PDF format) >>