Amorning Alexa-WiFi Hydroponics Growing System User Manual
- May 15, 2024
- AMORNING
Table of Contents
Amorning Alexa-WiFi Hydroponics Growing System

Introduction
In recent years, indoor gardening has surged in popularity, offering individuals the opportunity to cultivate their own fresh produce within the comfort of their homes. Among the plethora of options available, the Amorning Alexa-WiFi Hydroponics Growing System stands out as a beacon of innovation and efficiency. This state-of-the-art hydroponic system combines advanced technology with user-friendly features to provide a seamless gardening experience like never before.
Embark on Your Plant Journey
With the Amorning Alexa-WiFi Hydroponics Growing System, cultivating a thriving indoor garden has never been more accessible or rewarding. Whether you’re a busy urban dweller with limited space or a gardening enthusiast looking to expand your green thumb repertoire, this innovative system offers the perfect solution. Say goodbye to soil mess and hello to a lush and vibrant indoor oasis – all at your fingertips. Experience the future of indoor gardening with Amorning today.
Parts Description

- LED Light Board : This is the flat panel at the top of the system that houses the LED lights which provide the necessary light spectrum for plant growth.
- Adjustable : The height of the LED light board can be adjusted to accommodate the growth of the plants. The adjustment mechanism likely involves the telescopic aluminum rod.
- Telescopic Aluminum Rod : This rod connects the grow deck to the LED light board and can be extended or shortened to change the height of the light source. It is marked with measurements of 9.44 inches when contracted and 19.29 inches when fully extended.
- Multifunctional Vent : This feature, likely on the grow deck, is designed to allow air circulation and possibly additional functions such as cable management or access to the water reservoir.
- Grow Deck : The surface area where the planting baskets or pods are placed, this is the main area where the plants grow.
- Planting Basket/Cotton : Each pod likely comes with a planting basket and cotton or similar material used as a growing medium for the plants.
- Water Inlet : This is the port through which water is added to the system’s reservoir.
- Water Storage Tank : The tank or base of the system where the water and nutrient solution are stored, which the plant’s roots will grow into.
- Water Level Observation : A feature, such as a window or indicator, that allows you to monitor the water level in the storage tank without opening the system.
Dimensions
The dimensions are:
- Overall height: 25.59 inches
- Length of the grow deck: 13.77 inches
- Width of the grow deck: 8.26 inches
Specifications
- Style: Hydroponics Growing System
- Brand: AMORNING
- Product Dimensions: 17 inches (Diameter) x 11 inches (Width) x 8 inches (Height)
- Special Feature: Energy Efficient, Full Spectrum
- Light Source Type: LED
- Material: Aluminum
- Lamp Type: Night Light
- Room Type: Garden
- Base Material: Aluminum
- Recommended Uses for Product: Plant Growth
- Power Source: Corded Electric
- Controller Type: Amazon Alexa
- Switch Type: Touch
- Connectivity Technology: Wi-Fi
- Included Components: Bulb
- Is Waterproof: True
- Number of Items: 1
- Lighting Method: Adjustable
- Control Method: App
- Indoor/Outdoor Usage: Indoor
- Number of Pieces: 15
- Connectivity Protocol: Wi-Fi
- Voltage: 12 Volts
- Manufacturer: AMORNING
- Item Weight: 6.89 pounds
- Special Features: Energy Efficient, Full Spectrum
- Batteries Included?: No
- Batteries Required?: No
Box Contents
The Amorning Alexa-WiFi Hydroponics Growing System includes the following contents:
- 15 pods for growing plants
- Sponges
- Grow domes
- Covers
- 1 bag of seeds
- 2 bottles of nutrients
- A 7.5L water tank
- An LED grow light
- A WiFi-enabled app for control
- A built-in fan and pump
- Up to a 19.3-inch height-adjustable system
Parts and Components

- TDS & EC Meter: This is a digital meter used to test the total dissolved solids (TDS), electrical conductivity (EC), and temperature of the water in your hydroponic system, which are critical parameters for plant health.
- Grow Dome : A small, clear dome that helps to maintain humidity around the seedlings as they begin to grow, creating a mini greenhouse effect.
- Pod Label : These are labels that you can attach to the grow pods to help you identify the plant species or varieties you are growing.
- Non-GMO Seeds : A bag of seeds that are non-genetically modified organisms (non-GMO), which ensures you are growing natural, unaltered plants.
- Grow Sponge : These sponges are used as a growing medium for the seeds. They hold moisture and provide a stable environment for seed germination and root growth.
- Grow Basket : The netted containers that hold the grow sponges and provide support for the plants as they grow. They are designed to allow the roots to grow through and reach the nutrient solution.
- Nutrients : Two bottles of concentrated nutrient solution, which contain the essential minerals and nutrients that plants typically get from the soil. These will be diluted with water and added to the hydroponic system to feed the plants.
Features
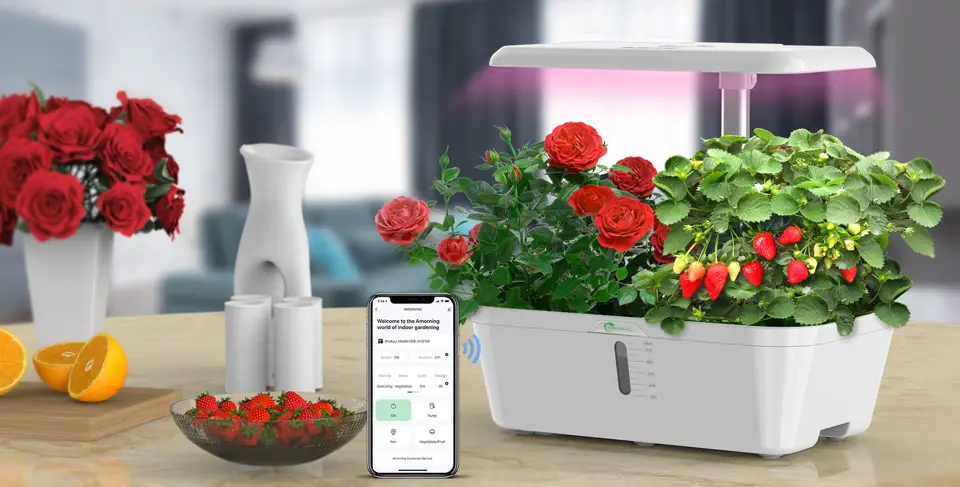
- 15 Pods Hydroponic System: With this cutting-edge system, you may grow up to 6 different types of fruits, vegetables, flowers, or herbs at once, increasing the amount of produce you can harvest indoors. It also makes seedling growth easier for transfer. It’s easy and fun to set up because all the accessories you need, like sponges, grow domes, covers, seeds, and nutrients, are provided.

- Accelerated Growth and Energy Conservation: The apparatus incorporates a 24-watt LED grow light, which offers plants the complete spectrum of sunlight necessary for swift and organic development. The growth rate of this hydroponic system can be up to five times faster than that of conventional outdoor gardening. The LED light panel uses just 0.48 kWh per day, making it incredibly energy-efficient.

- Two Planting Modes: To customize the light conditions for their plants, users can select between the “Vegetable” and “Melon & Fruits” modes. Because the LED light height is adjustable, sufficient light coverage is guaranteed for the whole growth cycle of the plant.

- Large 7.5L Water Tank: During the growing period, the system comes with an autonomous 7.5-liter water tank that can sustain plant development for two to three weeks. Users can keep an eye on the water level through a visible window on the tank, and the mobile app can remind you to replenish fertilizers and water when needed.

- App Remote Control: Users can operate the system remotely from any location thanks to WiFi connectivity and compatibility with the AMORNING “Smart Life” app. The software may be used for several tasks, such as tracking plant development, changing planting modes, modifying the fan and pump systems, and getting alerts when water and nutrients need to be replenished.
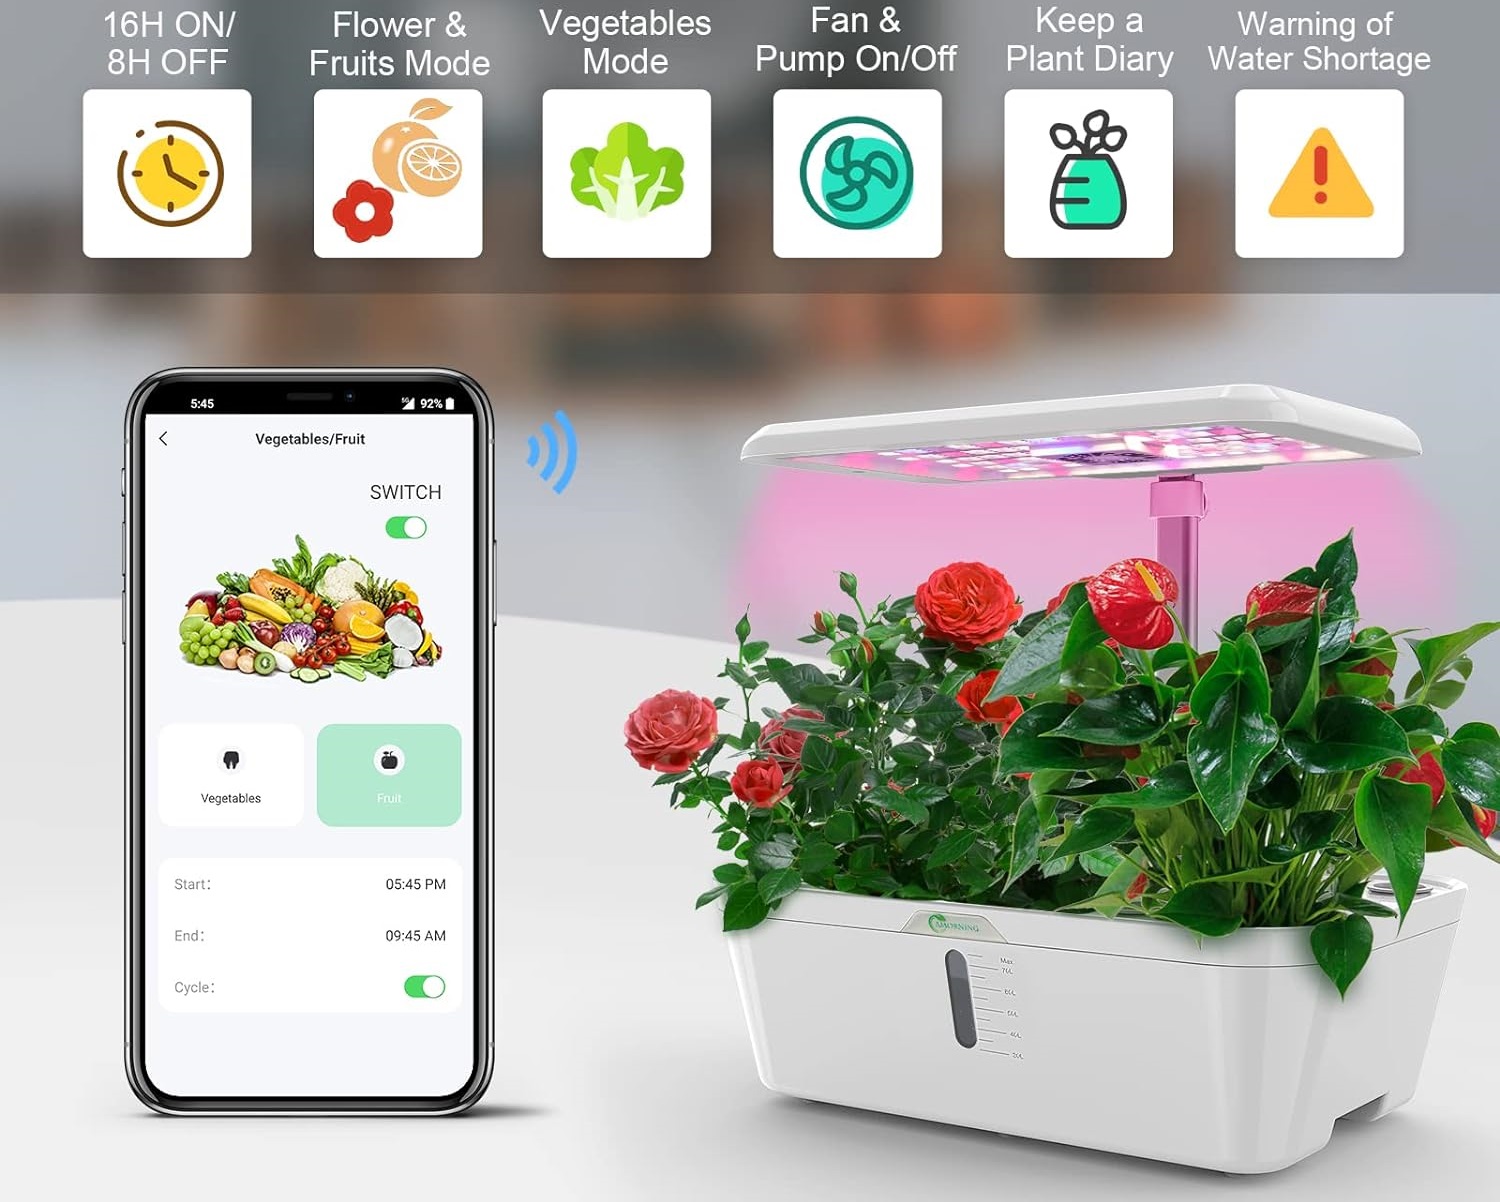
- Automatic Timer: The device has an automatic timer that makes sure there are exact light cycles of 16 hours of light and 8 hours of darkness. This encourages ideal plant growth by simulating the natural cycle of day and night.

- Extensive Starter Kit: The system includes all the add-ons needed to garden hassle-free, including grow domes, sponges, grow baskets, pod labels, TDS&EC meters, non-GMO seeds, and fertilizer replacements. All that is needed for users to begin their journey into indoor gardening is water, nutrients, and seeds.
- Height-Adjustable Design: The system’s design allows for adjustments in height to suit varying plant growth phases, from sowing to harvest. This guarantees that plants have enough light and room to grow to their full potential.

- Simple to Use Interface: The system is easy to operate and offers versatility by being able to be operated by touch or Amazon Alexa. Furthermore, the user handbook offers comprehensive guidance on how to utilize the companion app efficiently.
Usage Instructions
Setup Instructions

- Connect the system to a power source.
- Install the AMORNING “Smart Life” app on your smartphone or tablet to control the system remotely
Planting Instructions

- Insert Net Pots : Place the net pots into the openings of the hydroponic system’s growing area.
- Set Up Sponges : Arrange the sponges in the net pots. These are likely where the seeds are planted or seedlings are placed.
- Addition of Water/Nutrients : Pour water and possibly nutrients into the main reservoir of the system until it reaches an indicated level.
- Connecting Pipes : Connect the air or water circulation pipes to the system.
- Nutrient Solution Preparation : Measure and prepare the nutrient solution which will feed the plants.
- Pouring Nutrient Solution : Add the prepared nutrient solution into the system’s reservoir.
- Starting the System : Turn the system on, possibly through a button or interface that may also be used for setting up the WiFi connection and integrating with Alexa for voice commands.
- Plant Growth : The plants successfully grow in the hydroponic system.
Modes Selection

The Amorning Alexa-WiFi Hydroponics Growing System offers different modes for growing plants. The system allows you to switch between these modes using the AMORNING “Smart Life” app, which also records your plants’ growing time, adjusts the fan and pump system as needed, and reminds you to add water when necessary.
Vegetable Mode
To activate the Vegetables Mode:
- Ensure your hydroponic system is plugged in and operational.
- Press the Switch button on the control panel to power on the system.
- Locate the mode selection area on the control panel.
- Press the button labeled Vegetables to select Vegetables Mode.
- The indicator on the control panel will light up green , confirming Vegetables Mode is active.
- The lighting system will adjust automatically and will not emit blue light in this mode, which is the optimal light setting for growing vegetables.
Additional Controls:
- To circulate water to the plants, press the Pump button.
- If your system is equipped with a fan for air circulation, use the Fan button to toggle it on or off.
Flower & Fruits Mode
To activate the Flower & Fruits Mode:
- Press the Switch button on the control panel to ensure the system is on.
- Select the mode for growing flowers and fruits by pressing the button labeled Melon/Fruit.
- The indicator on the control panel will illuminate red , signaling that Flower & Fruits Mode is now active.
- In this mode, blue LED lights will be activated to provide a light spectrum conducive to the blooming and fruiting stages of plant growth.
Additional Controls:
- Press the Pump button as needed to enable water circulation.
- Use the Fan button to turn on the fan for proper ventilation, if available.

Notes:
- It’s recommended to check the water level and nutrient concentration each time you switch modes to ensure optimal growing conditions.
- If your system is connected to Alexa, you may also be able to switch modes using voice commands. Consult your user manual for specific voice commands and integration instructions.
How to use the AMORNING Nutrients
Preparation
- Read the Labels : Begin by thoroughly reading the labels on the Amorning Nutrients packaging to understand the recommended dosages and any safety warnings.
- Safety First : Always wear gloves and ensure you’re working in a well-ventilated area when handling nutrients to prevent skin irritation or inhalation of any powders or fumes.
- Use Measuring Tools : Have measuring cups or spoons and a mixing stick or spoon ready for accurate measurement and thorough mixing of the nutrient solution.
Mixing Nutrients
- Fill Reservoir : Fill the hydroponic system’s reservoir with water. The temperature of the water should be lukewarm, ideally between 65°F and 70°F (18°C and 21°C) for optimal nutrient absorption.
- Measure Nutrients : Following the dosage recommendations on the nutrient packaging, measure out the appropriate amount of nutrients for the volume of water in your reservoir.
- Add Nutrients to Water : Slowly add the nutrients to the water, not the other way around, to prevent nutrient concentration shock.
- Mix Thoroughly : Stir the solution thoroughly to ensure all the nutrients dissolve completely. Some nutrients may have different solubility levels, so take your time to mix until the water is clear.
Monitoring and Maintenance
- Check pH Levels : Use a pH meter to check the pH level of the nutrient solution. The ideal pH range for most hydroponic systems is between 5.5 and 6.5.
- Adjust if Necessary : If the pH is not within the ideal range, use pH up or pH down solutions to adjust it accordingly.
- Monitor Electrical Conductivity (EC) : Use an EC meter to monitor the strength of the nutrient solution. If the EC is too high, it means the solution is too concentrated and you should add water to dilute it. If it’s too low, more nutrients may be needed.
Using the Nutrients
- Introduce to System : Once the nutrient solution is prepared, you can introduce it to your hydroponic system. Make sure your system’s pump is turned on so that the solution is distributed evenly.
- Observe Plant Response : Keep an eye on your plants for any signs of nutrient deficiencies or toxicities. Adjust your feeding schedule and nutrient concentrations as necessary.
- Regular Changes : Change out your nutrient solution every 1-2 weeks to prevent nutrient imbalances and to provide fresh nutrients to your plants.
Notes:
- Always ensure you are using the nutrients formulated for the specific type of plants you are growing.
- It’s crucial to keep the nutrient solution at an appropriate level in the reservoir; too low and the plants’ roots may dry out, too high and you may suffocate them.
Care and Maintenance
- Clean the system regularly to prevent the buildup of algae, mould, and other contaminants. Use a mild detergent and water solution to clean the containers, grow domes and other components. Rinse thoroughly with clean water afterwards.
- Monitor the water level in the reservoir regularly and refill as needed to ensure continuous hydration for the plants. Use the visual window on the water tank or the mobile app to check the water level.
- Keep track of nutrient levels in the reservoir and replenish as necessary. Follow the instructions provided with the nutrient solutions for proper mixing and application. Monitor the pH and EC levels using the included TDS&EC meter and adjust as needed.
- Adjust the height of the LED grow light to maintain an optimal distance from the plants as they grow. Follow the recommendations for specific plant varieties and growth stages provided in the user manual.
- Regularly inspect the plants for signs of disease, pests, or nutrient deficiencies. Prune any dead or damaged foliage to promote healthy growth. Keep an eye out for root rot or clogging in the hydroponic system and address any issues promptly.
- Utilize the AMORNING “Smart Life” app to monitor the system remotely. Check plant growth statistics, receive notifications for water and nutrient levels, and adjust settings as needed from anywhere.
- Periodically calibrate the system components, such as the pH and EC meters, to ensure accurate readings. Follow the calibration instructions provided in the user manual or consult the manufacturer for assistance.
- Regularly inspect and clean the fan and pump components to ensure proper operation. Remove any debris or blockages that may impede airflow or water circulation.
- Place the hydroponic system in a stable and secure location away from direct sunlight, extreme temperatures, and drafts. Protect the system from electrical hazards by keeping cords and connections dry and undamaged.
Troubleshooting Guide
| Issue | Steps |
|---|---|
| Water and Nutrient Levels | 1. Regularly check and adjust the water and |
nutrient levels in the system to ensure optimal plant growth. 2. Refer to the
AMORNING “Smart Life” app for guidance on maintaining the correct water and
nutrient levels.
LED Light Malfunction| 1. Inspect the LED grow light for any damage or
malfunction. 2. Ensure that the power source is connected and that the light
is functioning properly. 3. If necessary, consult the product manual or
contact customer support for further assistance.
Fan and Pump System| 1. Check the fan and pump system for any blockages or
damage. 2. Ensure that the power source is connected and that the fan and pump
are functioning properly. 3. If necessary, consult the product manual or
contact customer support for further assistance.
App Connectivity| 1. Ensure that your device is connected to the internet and
that the AMORNING “Smart Life” app is updated to the latest version. 2. If you
continue to experience issues with app connectivity, contact customer support
for assistance.
Plant Health Concerns| 1. Monitor your plants for signs of disease, pests, or
nutrient deficiencies. 2. Address any health concerns promptly by adjusting
the system settings or taking appropriate action.
FrequentlyAsked Questions
What is the Amorning Alexa-WiFi Hydroponics Growing System?
Amorning Alexa-WiFi Hydroponics Growing System is a smart, Wi-Fi-enabled hydroponics system that allows you to grow plants using the Alexa app.
How does the Amorning Alexa-WiFi Hydroponics Growing System work?
The system uses a combination of LED grow lights, a water tank, nutrients, and a fan and pump system to create an optimal environment for plant growth.
How do I switch between different modes on the Amorning Alexa-WiFi Hydroponics Growing System?
You can switch between modes using the AMORNING Smart Life app on your smartphone or tablet.
How do I troubleshoot common issues with the Amorning Alexa-WiFi Hydroponics Growing System?
Common issues with the system can be addressed by checking water and nutrient levels, LED light malfunction, fan and pump system, app connectivity, and plant health concerns.
How can I monitor and control the Amorning Alexa-WiFi Hydroponics Growing System remotely?
You can monitor and control the system remotely using the AMORNING Smart Life app on your smartphone or tablet.
How can I troubleshoot connectivity issues with the Amorning Alexa-WiFi Hydroponics Growing System?
To troubleshoot connectivity issues, ensure that your device is connected to the internet and that the AMORNING Smart Life app is updated to the latest version. If necessary, restart the system or reset the network settings on your device.
How do I monitor and control the Amorning Alexa-WiFi Hydroponics Growing System remotely?
You can monitor and control the system remotely using the AMORNING Smart Life app on your smartphone or tablet.
How can I ensure the longevity of my indoor hydroponics system?
Choose a durable system with advanced technology. Use a compatible growing medium. Monitor water quality regularly. Use food-grade plastic for components. Perform regular maintenance and cleaning.
How does a hydroponics system compare to traditional soil-based gardening in terms of plant growth?
Hydroponic systems offer higher yields, faster growth, better water efficiency, space-saving design, and customization options compared to traditional soil-based gardening for plant growth.
What are the different types of hydroponics systems?
There are several types of hydroponic systems, each offering unique advantages for plant growth. The Wick System is a passive method using a wick to deliver nutrients to plant roots. Water Culture involves growing plants directly in a nutrient solution. Ebb and Flow systems flood plant roots periodically. Drip Systems deliver nutrients through drippers, while Nutrient Film Technology (N.F.T.) uses a thin film of nutrient solution over roots. Aeroponic Systems mist plant roots in an oxygen-rich environment, promoting rapid growth and efficient nutrient uptake. Each system caters to different needs and preferences, providing flexibility for various growing environments and plant types.
What are some common mistakes to avoid when setting up an indoor hydroponics system?
When setting up an indoor hydroponics system, it's crucial to avoid common mistakes like sudden changes in light levels or room temperature, using incompatible growing media, poor water quality, inadequate nutrient management, incorrect plant spacing, ventilation issues, improper pH levels, lighting schedule errors, incorrect water temperature, and water flow rate discrepancies. Beginners should start with a simple setup and gradually progress to more complex systems while monitoring and adjusting factors like light, temperature, nutrients, and pH to ensure optimal plant growth.
Read User Manual Online (PDF format)
Read User Manual Online (PDF format) >>