i Solar Hybrid Inverter Application User Guide
- June 16, 2024
- i Solar
Table of Contents
i Solar Hybrid Inverter Application

Product Information
Specifications:
- Operating system requirement: Android
- Wi-Fi name (AP SSID): FC41D_
- Wi-Fi password (AP Password): 12345678
Product Usage Instructions
Section 1: App Download and Installation
-
Turn on your mobile device.
-
Open the mobile’s Wi-Fi settings.
-
Connect your device to the Wi-Fi with the name that begins with FC41D_. The default password for this Wi-Fi is 12345678.
-
After the Wi-Fi connection is successful, click the i.Solar App installed on the phone to enter the login page.
-
Click the Network Config button to enter the Wi-Fi configuration page.
-
Enter your router name (STA SSID) and router password (STA Password), then click the Save button to complete the setting. If you check the Open box marked in red, you only need to enter the router name (STA SSID), you don’t need to enter the router password. Click the Save button to complete the setting.
-
Enter the Wi-Fi name (AP SSID) and WiFi password (AP Password) of the Wi-Fi card, confirm the password again, and click the Save button to complete the setting of the Wi-Fi module. If you check Open marked in red, you only need to enter the Wi-Fi name (AP SSID), you don’t need to enter the Wi-Fi password and Confirmation. Click the Save button to complete the setting.
-
After entering the value of the baud rate, click the Save button to complete the setting of the Uart Baud Rate.
Section 2: Login -
After opening the app, enter the login page.
-
Fill in all required information (username and password).
-
Click the Register button to complete the user registration.
-
Once registration is complete, click Click to log in or return to the previous page.
-
Swipe left or click the left arrow to return to the login page.
-
Enter the username and password to log in.
Section 3: Home Page -
Log in to enter the App.
-
The default Home page will appear where you can view the charts (left screenshot).
-
Click the button
Day’,Month’, andYear’ to query the power generation data. ClickTotal’ to query the annual power generation data. -
Tap the icon (located on the top right corner) to enter the page to add, delete, or rename the device.
-
Enter the device serial number to add the device.
-
Rename (left screenshot) and delete (right) the devices by pressing the buttons highlighted by the red box.
Section 4: Real-time Data -
Energy’ displays battery power, grid power, solar power, and load consumption. Rename the device by pressing theRename’ button. -
`Real-time’ displays solar, grid, load, and battery information.
-
Press
Day’,Month’, orYear’ to query the hourly, daily, or monthly power generation data. PressTotal’ to query the annual power generation data. -
`Parameter’ displays the setting items. Note that the setting items on the parameter page will be different for different models. Tap on the dropdown icon to select the setting and click the Apply button to change the setting.
-
`Control’ displays the power on/off for AC output power.
-
`Product’ displays the product and rating information (right screenshot).
-
`Log’ displays the data log, solar power generation log, and event.
Frequently Asked Questions (FAQ)
-
Q: What is the default Wi-Fi password for connecting to the device?
A: The default Wi-Fi password is 12345678. -
Q: How do I add a device to the app?
A: Tap the icon located on the top right corner of the Home page, enter the device serial number, and click Add. -
Q: How do I rename or delete a device?
A: On the Home page, press the buttons highlighted by the red box to rename or delete a device.
Introduction
Wi-Fi module can enable wireless communication between hybrid inverters and
the monitoring platform. Users can remotely monitor and control their
inverters when they combine the Wi-Fi module with i.Solar APP. The App uses
the Wi-Fi chip to provide remote monitoring data services, which is beneficial
for the daily data monitoring of the inverter, querying the real-time data in
the device, sending commands from the device, and operating the device
remotely. The app is available for both iOS and Android.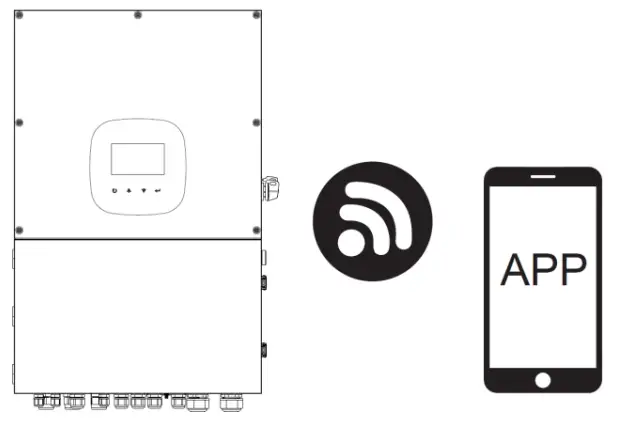
iSolar App
App Download and Installation
- Operating system requirement for your smartphone:
- iOS system supports iOS 12.0 and above.
- Android system supports Android 10.0 and above.
- You may find the “i.Solar” app from the Apple® Store and Google® Play Store.
WiFi Model Setting
-
Step 1: Turn on your mobile device. This example uses the Android system.
-
Step 2: Open the mobile’s Wi-Fi settings.

-
Step 3: Connect your device to the Wi-Fi with the name that begins with “FC41D_”. The default password for this Wi-Fi is 12345678.
-
Step 4: After the Wi-Fi connection is successful, click the i. Solar App installed on the phone to enter the login page. Then, click the “Network Config” button to enter the Wi Fi configuration pag e.
-
Step 5: Click the “ Network Config” button to enter the Wi-Fi configuration page.

-
Step 6: Enter your router name (STA SSID) and router password (STA Password), then click the “Save” button to complete the setting.
If you check the “Open” box marked in red, you only need to enter the router name (STA SSID), you don’t need to enter the router password. Click the “Save” button to complete the setting. -
Step 7: Enter the Wi-Fi name (AP SSID) and Wi-Fi password (AP Password) of the Wi-Fi card, confirm the password again and click the “Save” button to complete the setting of the Wi-Fi module.
If you check “Open” marked in red, you only need to enter the Wi-Fi name (AP SSID), you don’t need to enter the Wi-Fi password and Confirmation. Click the “Save” button to complete the setting. -
Step 8: After entering the value of the baud rate, click the “Save” button to complete the setting of Uart Baud Rate.
Login
After opening the app, enter the login page shown below. After filling in
all required information (user name and password), click the “Register” button
to complete the user registration. Once registration is complete, click “Click
to log in” or return to the previous page. Swipe left or click the left arrow
to return to the login page. Enter the user name and password to log in.
Home Page
Log in to enter the App. The default Home page will appear where you can
view the charts (left screenshot). Click the button ‘Day’, ‘Month’, and ‘Year’
to query the power generation data. Click ‘Total’ to query the annual power
generation data. Tap the icon (located on the top right corner) to enter the
page to add, delete or rename the device. Enter the device serial number to
add the device.
Rename (left screenshot) and delete (right) the devices by pressing the
buttons highlighted by the red box.
Real-time Data
- ‘Energy’ displays battery power, grid power, solar power, and load consumption. Rename the device by pressing the ‘Rename’ button.

- ‘Real-time’ displays solar, grid, load, and battery information. Press ‘Day’, ‘Month’, or ‘Year’ to query the hourly, daily, or monthly power generation data. Press ‘Total’ to query the annual power generation data.

- ‘Parameter’ displays the setting items. Note that the setting items on the parameter page will be different for different models. Tap on the dropdown icon to select the setting and click the “Apply” button to change the setting.

- ‘Control’ displays the power on/off for AC output power. ‘Product’ displays the product and rating information (right screenshot).

- ‘Log’ displays the data log, solar power generation log and event. The following are instructions on how to navigate through each of the options.

Data log
Tap the time, select the date and click the “Browse” button to update log.
Power Generation Log
Tap the time, select the day, month or year, and click the “Done” button to
update log.
Event Log
Tap the time, select the month and click the “Browse” button to update log.
Configuration
Click the “Config” tab to enter setting screen. ‘Change Password’ by
entering the old password, entering the new password, confirming the new
password, and clicking the Apply button to complete the password modification
function. ‘Delete Account’ by pressing delete account.
About
Click the ‘About’ tab to enter the about page, where you can view the
information about the App.
Read User Manual Online (PDF format)
Read User Manual Online (PDF format) >>