Allied Time AT-5500 Fingerprint RFID Calculating Time Recorder User Manual
- June 5, 2024
- Allied Time
Table of Contents
**Allied Time AT-5500 Fingerprint RFID Calculating Time Recorder User Manual
**
AT5500 FEATURES OVERVIEW
The AT 5500 is a biometric time clock designed for small businesses with
simple work rules. Employees can record punches via Biometric Finger Scan or
via RFID Card. Employee has to Select IN or OUT buttons prior to punching.

IN – = Clock IN (Ex. Arriving to work)
OUT+ = Clock OUT (Ex. Taking a lunch break)
Reminder will show up on LCD screen if employee forgets to select IN/OUT key prior to punching.
The AT5500 will calculate total hours worked based on the actual punch time for a set Pay Cycle. You can also select custom Start and Finish date range prior to printing timesheets.
SAFETY INFORMATION

- Do not modify this product, as a fire, electrical shock, or breakdown could occur.
- Do not attempt to remove the covers and panels that have been affixed to the product. Some parts have high-voltage components that could cause an electrical shock or blindness.
- Only use the power cord supplied in the package. Failure to use this cord could result in a fire or electrical shock.
- Do not unplug and plug in the power cord with wet hands, as an electrical shock could occur.
- Plug the power cord all the way into the power outlet. Failure to do this could result in a fire or electrical shock.
- The device must be connected to an earthed main socket-outlet. The socket-outlet should be within lm of the device and should be easily accessible.
- If smoke or fire sparks occur when connecting the machine to electric power, please stop using the machine and contact your dealer immediately.
FCC Warning:
The AT5500 has been tested and found to comply with the limits for a Class A
digital device, pursuant to Part 15 of the FCC rules.
UNPACKING THE UNIT
Prior to operating AT5500, please open the Thermal Paper Roll cover and remove the Caution Label. Install Paper Roll in correct position as shown below:
-
Open the fount ease

-
Pull out the printer cover

-
Install the paper roll
- Pis note the direction

- Pis note the direction
-
Close the printer cover & case
Please note: in order to print on Thermal Paper Roll, the unit must be plugged into regular power source. It will not print in Battery Operation Mode.
Parts Description


Keyboard Buttons/Functions
DEL/PRINT: Print out timesheet, Backspace
ESC: Delete last entry, View firmware, Confirm entry, Navigate back
-IN : Decrease number of current character by one, Clock IN, Move UP
+ OUT: Increase number of current character by one, Clock OUT, Move
DOWN
OK/MENU: Confirm current character, Press to view LOGS, hold to access
MAIN Menu, Add new character
POWER: Press to view “Note”, hold to Power Off, or Change character type
(Upper, Lower, numbers, symbols)
Package Contents

SETUP YOUR SYSTEM
Prior to using this time clock, follow the steps below to download and setup your employees/departments/shifts.
Step 1: Connect the machine to Power Source and press “Power” button.
Insert USB Stick into the USB Slot.
Step 2: USB DISK screen will come up (note, if you have administrator
already setup, you will need to enter login credentials)
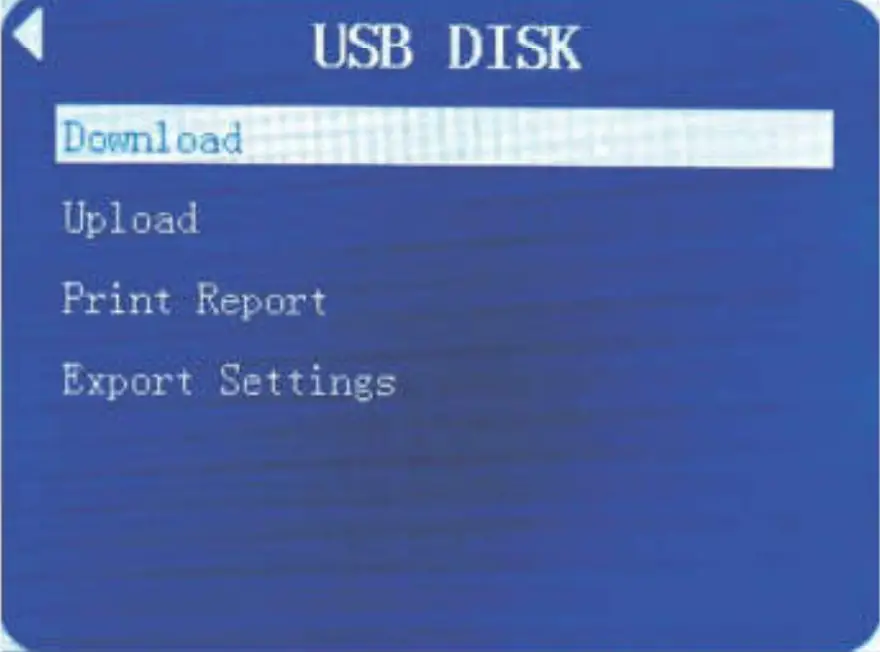
Step 3: Select Download by pressing OK button, then select “Setup File’.
Step 4: When download is finished, remove USB Stick from clock and insert
USB Stick to your PC that has Excel Installed. Open the SetTable File in
Excel, which consists of 4 sheets (note, depending on the version of your
Excel used, you may be prompted with a warning when attempting to open the
file – simply select “YES” to continue).
SHEET 1 – Departments (Max 16 departments can be created)

Sheet 2 — Employee Settings (Max. 200 employees can be registered)

Sheet 3 — System Info

Sheet 4 — Add Missing Punch (use for adding missed punches)

You can change the defaults to your Company’s Name (displayed at the clock), Daylight Savings time start finish, and other preferences as shown. We suggest you keep Re-verify settings “as is” to prevent duplicate accidental punching.
Step 5: After you enter your departments, employees and make any other
desired changes, press SAVE (if warning comes up make sure to select -YES”
to keep existing format ) to save SetTable file. Remove USB Stick from
your PC and insert into the clock’s USB Slot.
Step 6: Insert USB Stick into the USB Slot, select Upload -> Setup File
and press OK. Once your information is uploaded. you will see confirmation
message “Upload Success”.
Step 7: Register Employee Finger Templates and RFID badges. Employee
fingerprint must be registered at the clock.
-
Press and hold Menu (if you setup Administrator, you will need to enter credentials). Select USER -> View Users. A list of registered users will appear. Select the user you wish to add Fingerprint or RFID Badge to.

-
Select EDIT, and then select Finger (or, RF Card). The clock will instruct the user to place a finger at least twice to create a finger template. Press down firmly and release quickly for best results. When completed, the clock will display “Enrolled” message. You can enroll each employee with multiple fingers; we recommend using Thumb and Index fingers for best results. Press “ESC” to go back one screen at a time until you are back at the list of users to select another employee. To enroll RF badge, waive the desired badge in front of the clock near the finger scanner. “Enroll OK” will display on LCD when registration is finished. Note Badge Number for your records.
-
After enrolling all employees, please download the User’s record and fingerprint as a backup file to save on your computer. Press and hold Menu, then select: Insert USB Stick and press SET to download the file. Make sure to copy/paste this file from USB Stick to your PC.
Your time clock should be ready to use. Please double-check that uploaded data on Machine is correct (e.g. Company Name, Employee Names, ID Card No…)
Step 8: ADMINISTRATORS
The clock settings can be protected by designating one or more users as
Administrators. Once there is an Admin set on the clock, the Menus can only be
accessed by an Administrator with their Finger Scan or RF Card.
To setup an Administrator, press and hold Menu

Select USER -> View Users. A list of registered users will appear. Select the user you wish to assign Admin access to and click EDIT. Then scroll down to menu option called Authority, and change user access from “User” to “Admin”. Click OK to save your selection.
You can delete administrator privileges by following above steps and changing permission level back to User.
CLOCK OPERATIONS
Employee punching
Finger: Select IN or OUT button on the clock and place your finger firmly on the sensor for a few seconds to punch IN or OUT.
Badge: Select IN or OUT button on the clock and waive the proximity badge close to the clock’s face below LCD screen and above Fingerprint sensor.
The clock will respond by displaying the employee’s name and a voice confirmation.
Reporting
There are two types of reports that can be generated with the machine: USB Excel Download and Thermal Time Card Printout.
Prior to downloading Excel reports, please adjust “Export Settings” (Menu -> USB Disk-> Export Settings). Make sure to assign the days when you pay cycle starts and ends. Leaving these settings OFF may result in incorrect date range for your punch reports.
To download reports to USB Stick, follow the steps below:
- Insert USB stick and select Download
- Select Punch Logs (User)
- Adjust pay period start/finish dates as needed
- Select Export Report
Remove USB Stick and insert to your PC to open (2) different reports in Excel Spreadsheet (press Yes to confirm format that might be different from your Excel version).
Attendance Summary Report

Time Card Detail Report
Time card reports will be displayed in the sheet named Time Detail report, and
will have as many tabs as you have employees.

Simply click on the Tab for employee you would like to view or print time card
for to display punch details

You may also chose to print time card reports to the Thermal Paper roll. Make sure your time clock is connected to Power Source prior to printing. Please follow below steps:
- Select MENU -> USB Disk -> Print Report
- Select Report Start Date (ex. 2015-11-02)
- Select Report End Date (ex. 2015-11-08)
- Select ALL, Dept or Single User
- Select Computations YES or NO (Calculated or Non-Calculated option) and click OK to initiate printing.

Once the report is printed, lift the paper sheet upwards to ‘cut’ from the main paper roll.
Managing Clock Data
Adding Missed Punches:
In the event that a user has failed to clock out or clock in at certain times,
manual insertion of punches is available. To insert missed punch time, follow
below steps:
Step 1: Enter the Main Menu by holding down ‘OK/MENU at the Main Screen.
If you have any administrators registered at this step, the unit will request
the credentials of one.
Step 2: Select ‘User’ Step 3: Select ‘View Users’
Step 4: A list of registered users will appear: Select the user you wish
to clock in at a specific time
Step 5: Select ‘Add Missed Punch’
Step 6: Adjust the values as needed
Step 7: Select ‘Confirm’ once done
Hunning a simple report with the inserted logs/punches within the range is recommended at this point.
You can also add missed punches using Excel Upload (useful for bulk punch
additions). Simply download Setup File, and once opened in Excel navigate to
the Tab called “Add Missed Punch”.

Please follow exact format as in above example for Date/Time. Once finished and saved, upload File to the machine using USB Upload.
Editing Punches:
In the case of a punch-type (IN/OUT) being incorrect, it may be adjusted. If a
punch-time must be changed, the punch must first be deleted (see below) and
then manually created (see previous section).
To change punch-type:
Step 1: Enter the Main Menu by holding down ‘OK/MENU at the Main Screen.
If you have any administrators registered at this step, the unit will request
the credentials of one.
Step 2: Select ‘User’
Step 3: Select View Users’
Step 4: A list of registered users will appear; Select the user whose
punch-type requires adjustment
Step 5: Select ‘Record Adjustments’
Step 6: Select the punch to be changed
Step 7: Select ‘Status’ and change the punch-type
Step 8: Press ‘ESC’ to leave the section and return to the punch list.
Continue to press ‘ESC’ and return to the home-screen if finished
Deleting Punches:
Step 1: Enter the Main Menu by holding down ‘OK/MENU at the Main Screen.
If you have any administrators registered at this step, the unit will request
the credentials of one.
Step 2: Select ‘User’ Step 3: Select ‘View Users’
Step 4: A list of registered users will appear; Select the user whose
punch-type requires adjustment
Step 5: Select ‘Record Adjustments’
Step 6: Select the punch to be deleted
Step 7: Select ‘Delete’ and confirm that the punch should be removed
Performing Backups:
Having a copy of all settings and user data outside the unit is always a good
habit to have. To store backup information to a USB pen drive:
Step 1: Insert the pen drive into the USB slot found under the front
cover. If you have any administrators registered at this step, the unit will
request for the credentials of one.
Step 2: Select ‘USB Disk’
Step 3: Select ‘Download’
Step 4: Select each category to download them into the pen drive
The pen drive should now have seven files: three files for the punch cards, two files for the user data, one file for the settings of the unit, and the current firmware for the unit Aside from the three files for the punch cards (“Time Card Detail”, “Time Card Summary”, and “Punch Logs”), the other files can be used to restore your unit to the time of this backup.
Restoring from a Backup:
Once you have successfully acquired a copy of a backup file, you can use it to
restore the unit from the point of which the backup file was made. To do this:
Step 1: Insert the pen drive with the backup files into the USB slot
found under the front cover. If you have any administrators registered at this
step, the unit will request for the credentials of one.
Step 2: Select ‘USB Disk’
Step 3: Select ‘Upload’
Step 4: Select each category to upload them from the pen drive.
It is highly recommended to reset the settings of the unit to its factory
defaults before proceeding. Instructions for that can be found at ‘Resetting
the Machine’ two sections after this one.

Deleting All Logs:
As you use the unit, it may start to reach full capacity when it comes to time stamps. At that point, performing a backup then clearing out the logs may be a good idea. To do this:
Step 1: Enter the Main Menu by holding down ‘OK/MENU at the Main Screen.
If you have any administrators registered at this step, the unit will request
the credentials of one.
Step 2: Select ‘Memory’
Step 3: Select ‘Clear Punch Data’ The logs on the machine should be clear
at this point.
These steps will not delete the users on the unit and should still operate as usual (with the exception of the logs, of course).
Deleting All Logs and Users:
When moving the unit to another location within the same organization, it may be a better idea to delete all the logs and users on the unit instead of resetting everything and starting from scratch.
This option allows for that. To do this:
Step 1: Enter the Main Menu by holding down ‘OK/MENU at the Main Screen.
If you have any administrators registered at this step, the unit will request
the credentials of one.
Step 2: Select ‘Memory’
Step 3: Select ‘Clear Punch and User Data’
All data related to the users registered and their logs should be deleted at this point. Departments, shifts, daylight savings, and other settings should remain untouched.
Resetting the Machine:
It might be required to reset the machine to its factory defaults in preparation for a restoration to one of its backups. If for any reason you need to reset the machine back to its factory defaults:
Step 1: Enter the Main Menu by holding down ‘OK/MENU at the Main Screen.
If you have any administrators registered at this step, the unit will request
the credentials of one.
Step 2: Select ‘Memory’
Step 3: Select ‘Reset Machine’
Useful Machine Settings
To setup DATE AND TIME:

Step 1: Enter the Main Menu by holding down ‘OK/MENU’ at the Main Screen.
If you have any administrators registered at this step, the unit will request
the credentials of one.
Step 2: Select ‘Time’ to enter correct Date. Hours. and Minutes.
You can also adjust hours format (12/23hrs) and minutes format (60/100s) as well as daylight savings time dates on this menu.
To adjust Day Change Time (useful for Overnight Shifts):
Enter the Main Menu by holding down ‘0K/MENU’ at the Main Screen, then select
General Settings and scroll down to Day Change Time option. The default
setting is 00:00 (midnight)- if your workers clock OUT past midnight hour,
please set it to later time in order to report their worked hours within the
previous day.

Additional options under General Settings:
Speaker — Disable or enable the sounds that play after checking
credentials Key Sounds — Disable or enable the sounds that play when using
the keypad Timeouts — seconds the unit waits in the menus betore going
back to the main screen
Verification Level — Adjust the sensitivity (or strictness) of the
fingerprint sensor
Note — Show or hide a note if any is configured
Replacing Thermal Paper Roll
-
Open the front case

-
Pull out the printer cover

-
Install the paper roll
- PIs note the direction

- PIs note the direction
-
Close the pnnter cover 84 case
Important Notices
- Switch on the “Battery On/Off Button” after connecting the DC power.(Optional).
- The backup battery must be kept charging by connecting the DC power to avoid battery damage.
- The Thermal Print out function will not operate while in Battery Mode (the clock needs to be connected to Power Source).
Troubleshooting
| Problem | Reason | Action / Solution |
|---|
Shown
No Register
| Fingerprint not yet registered| Enroll fingerprint
Shown “Verified’| Already punched| Within Re-verify period, double Punching
Printer Error| No paper roll ran out of paper| Replace new paper roll
PWD Wrong| Input wrong password|
- Input correct password
- Contact dealer if password forgotten
Shown
Watch Failed”| Fingerprint not in good position| Place the finger again on the
Optical Fingerprint Scanner
Shown
“Create File Err”| Fail to download report from Machine|
- Re-Insert the USB Pen Drive into USB Connector correctly
- Switch off and on the machine and try again.
- Try to use different brand USB
Shown
‘Fingerprint Repeat”| Fail to register Fingerprint on the Machine|
- Fingerprint already registered
- Check the fingerprint record
- Try Registering a different finger
appears on front of the| Daylight Saving Time started| ‘Reset Info” & reboot
the machine.
Cannot open the downloaded Report/ Set Table| Invalid letters or symbols in
Set Table (INVALID LETTER samples: <>”=:)|
- Double check machine to see if there are any symbols such as <>”.: shown on the screen.
Delete the symbols and download the report again.
CANNOT OPEN SPREADSHEET
- Check version of Excel (recommend 2007 or higher)
- Check version of Windows (Windows 7, 8, or 10 ONLY)
CLOCK NOT CALCULATING
- Ensure that “Computations = YES” in report settings
- Ensure that employee has used the IN/OUT buttons in sequence
- Manually enter missed punches, generate report again
- Contact Allied Time USA: 888-860-2535
CREATE FILE ERROR
- Make sure that there is space on the drive
- Insert USB drive and turn off the device
- With the USB drive inserted turn device back on and retry action
DEVICE REPEATING “PRESS AGAIN”, DISPLAYING “LIFT FINGER”
- Fingerprint scanner is dirty
- Turn device OFF
- Using a soft cloth and a small amount of window cleaner, clean the scanner glass, especially the edges
- Make sure glass is dry and free of debris
- Turn device ON
FINGERPRINT PUNCHES WRONG USER
- Increase fingerprint verification level (MENU > System > General Settings> Verification Level (2 = lowest sensitivity, 4 = highest)
- Enroll multiple fingerprints and use different fingers to enroll
- Switch one user to badge punching
“FORMAT ERROR”:
- Erase “SetTable” from the USB drive, and download a fresh “SetTable” from the device
- Ensure that file is saved using “SAVE” button, not “SAVE AS…”
- File should be an “.xls” file (Microsoft Excel 97-2003) when viewed in Properties. Do not manually set this with a “SAVE AS…” save.
LCD ERROR/DAMAGE
- Contact Allied Time: 888-860-2535
MISSED PUNCHES
- See pages 14 – 16 “Managing Clock Data”
NAME/ID/DEPT NOT SHOWING ON UNIT:
- Check “SetTable” file to ensure that information was entered in the proper format, adhering to guidelines displayed in blue text
- ID must be three (3) numbers (001-200); NAME must be no more than 15 characters, including spaces; only 30 DEPT maximum
- Users are entered on the “MANAGE USER” tab of spreadsheet
- A new department is set on “DEPARTMENT SET” tab and then assigned on the “MANAGE USER” tab
PAPER WON’T FEED:
- Ensure that paper roll is install in the correct position, with the feed coming from the top of the roll as shown in the manual (Page 4)
- Ensure that the printer door is fully closed
- Press the “Feed/Mode” button while in “Print Report” menu to check the paper feed
PRINTER NOT PRINTING (PAPER FEEDS BUT NOTHING IS PRINTED)
- Fnst ire that unit is plugged in and not on battery power
- Ensure that paper is loaded correctly, with the feed coming from the top of the roll (see page 4 of manual)
“SETTABLE” FILE DISPLAYING GARBAGE WHEN OPENED
- Check version of Excel (recommend 2007 or higher)
- Check version of Windows (Windows 7, 8, or 10 ONLY)
“UDISK MOUNT” ERROR:
- Insert USB drive and turn off the device.
- With the USB drive inserted, turn device back on, retry action
USB PORT UNRESPONSIVE:
- Contact Allied Time: 888-860-2535
Specification
| Print mode | Thermal printer |
|---|---|
| Data storage | USB data import/export |
| User capacity | 512users |
| Storage capacity | 64000data |
| Access | Fingerprint and RFID Card |
| Resolution | 500 dpi |
| Active scan area | 16x16mm |
| Verification mode | 1:1 or 1:N |
| Identification speed | < 1 sec |
| FAR / FRR | < 0.0001%/ < 0.01% |
| Card | EM card (125KHz) |
| Reading distance | 5-10 cm |
| Language | English |
| Indicator | 2.8inch resolution 320*240 |
| Power supply | DC 9V 2.5A (input) |
| Consumption | 22.5W |
| Working temperature | O’C —60 C |
| Machine dimensions | 220mm(h)120mm(w)85mm(d) |
| Net weight | 0.60kg |
| Thermal paper roll | 57mm(w) Dimensions ≤50mm(d) |
Appendix — Attention to Fingers’ Reading
Note try to put the finger in the middle of the reading window
This unit complies with the EMC directive 2004/108/EC
FCC Statement
This device complies with part 15 of the FCC rules. Operation is subject to the following two conditions:
- this device may not cause harmful interference, and
- this device must accept any interference received, including interference that may cause undesired operation.
Changes or modifications not expressly approved by the party responsible for compliance could void the user’s authority to operate the equipment.
NOTE: This equipment has been tested and found to comply with the limits for a Class B digital device, pursuant to part 15 of the FCC Rules. These limits are designed to provide reasonable protection against harmful interference in a residential installation. This equipment generates uses and can radiate radio frequency energy and, if not installed and used in accordance with the instructions, may cause harmful interference to radio communications. However, there is no guarantee that interference will not occur in a particular installation. If this equipment does cause harmful interference to radio or television reception,which can be determined by turning the equipment off and on, the user is encouraged to try to correct the interference by one or more of the following measures:
- Reorient or relocate the receiving antenna.
- Reorient or relocate the receiving antenna.
- Reorient or relocate the receiving antenna.
- Consult the dealer or an experienced radio/TV technician for help important announcement Important Note:
Radiation Exposure Statement
This equipment complies with FCC radiation exposure limits set forth for an
uncontrolled environment. This equipment should be installed and operated with
minimum distance 20cm between the radiator and your body.
This transmitter must not be co-located or operating in conjunction with any
other antenna or transmitter.
Read User Manual Online (PDF format)
Read User Manual Online (PDF format) >>