SAND SILVER Printable Ring Sizer Instructions
- June 3, 2024
- SAND SILVER
Table of Contents

SAND SILVER Printable Ring Sizer

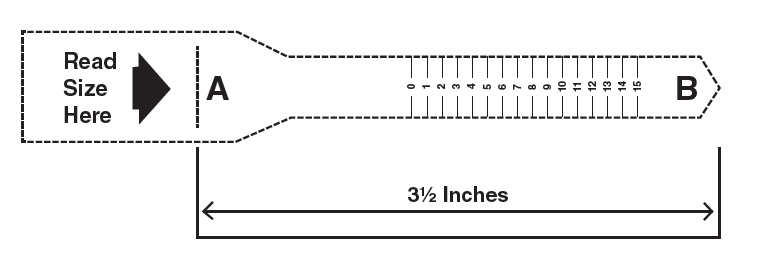
Make sure your printer is set to 100-percent. Do not reduce the print size in
your printer ‘page setup’ area. You can verify that the ring sizer printed
correctly by measuring it with a ruler; it should measure 3 1/2 inches long
from “A” to “B”.
To open the print dialog box, press CTRL + P for pc or COMMAND +P for mac.
Method A: Measure Your Finger
- Cut out the ring sizer.
- Cut a slit for Slot “A”.
- Wrap the sizer around the finger where the ring will be worn. Make sure the numbers are facing out.
- Pull the pointed end Tab “B” through Slot “A”until the sizer is snug. Make sure to allow size for your knuckle. If your knuckle is size in between the two.
- The number aligned with Slot “A” is your ring size.
- If the measurement lands between two numbers, your size is a half size.
Example: If your measurement falls between 5 and 6, your ring size is 5 1/2.
Wizing Tip : Measure your frap the sizer around your finger with the
numbers facing out ainger at the beginning of the day to avoid incorrnd slide
the ect measurements. More sizing mistakes are rmade by orderounded end
through the slit.ing rings too large rather than too small.
Method 2- Measure an Existing Ring
- Choose a ring that fits the desired finger.
- Place the ring over the circles below. Match the inside edge of the ring with the closest circle. This is the inside diameter of the ring.
- If the ring falls between two sizes, select the larger of the two.

Read User Manual Online (PDF format)
Read User Manual Online (PDF format) >>