Dolonm 014-HG-43501-WA Lighted Corner Curio Cabinet with Tempered Glass Doors Instruction Manual
- June 1, 2024
- Dolonm
Table of Contents
Dolonm 014-HG-43501-WA Lighted Corner Curio Cabinet with Tempered Glass
Doors
Product Information
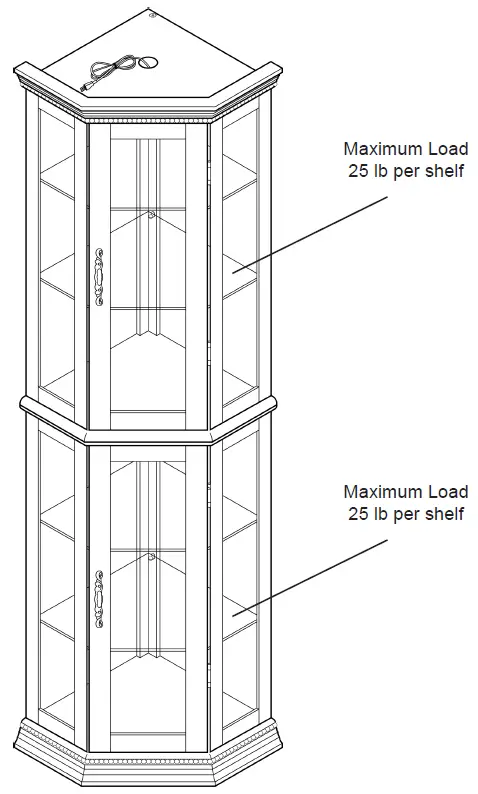
Specifications
- Estimated time for assembly: 100 mins
- Weight limitations: Maximum Load 25 lb per shelf
Frequently Asked Questions
- Q: Can I assemble this furniture alone?
- A: No, this furniture requires 2 people for assembly as mentioned in the instructions for safety and ease of assembly.
- Q: What should I do if I am missing any hardware or components?
- A: Do not use the product until you have restored the missing parts. Contact customer support if needed.
Information
- Estimated time for assembly: 100 mins
- Weight limitations are as follows:
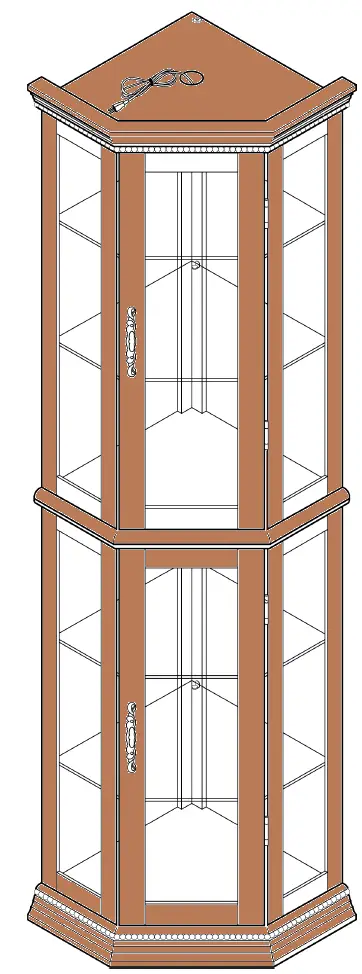
Product Overview
Information
- Assemble the furniture on an empty carton, carpet, or rug to prevent scratches or damage.
- For safety, please keep pets and children away from the assembly area.
- Ensure the product is fully assembled before use. If you are missing any hardware or products, do not use it until you have restored the missing parts.
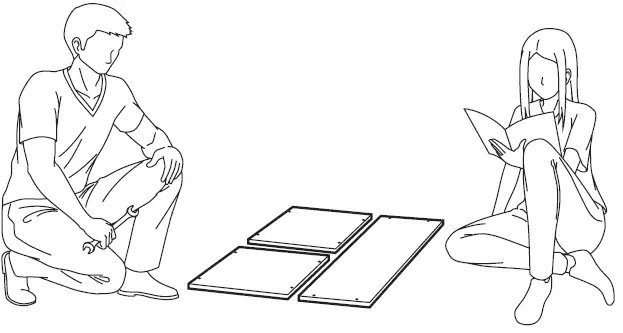
- This furniture requires 2 people for assembly.
- Read this instruction manual prior to assembly to familiarize yourself with the various steps.
- Lay out all components and hardware separately on a flat surface and make sure that no parts are missing or damaged before assembly. Do not destroy or discard any packaging until you are certain that you have all the necessary parts for assembly.
- Hand tight all hardwares and careful not to over tighten to avoid damaging the product.
CAUTION
- There are small components used in the construction of this product.
- Loose items should be kept away from pets and children to avoid a choking hazard.
- Keep all plastic bags and packaging film away from pets and children to avoid suffocation.
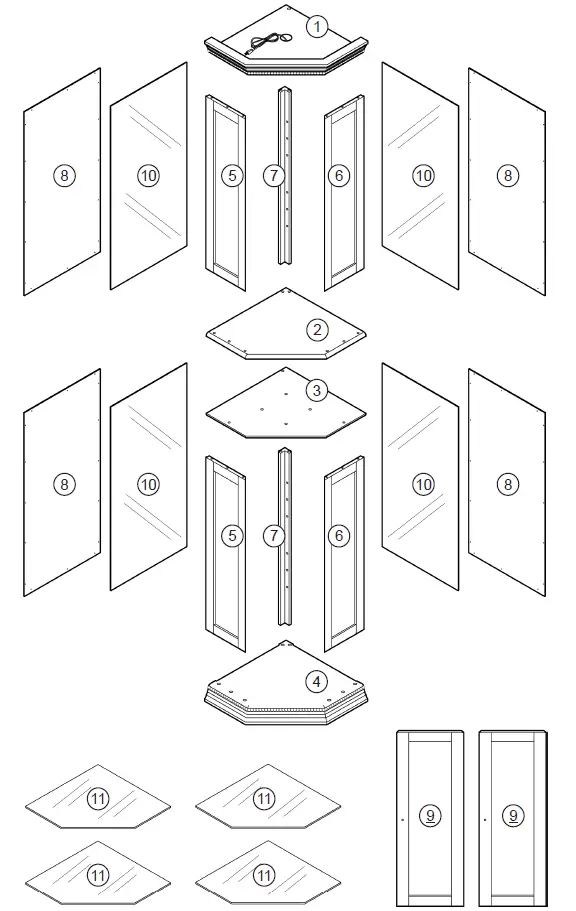
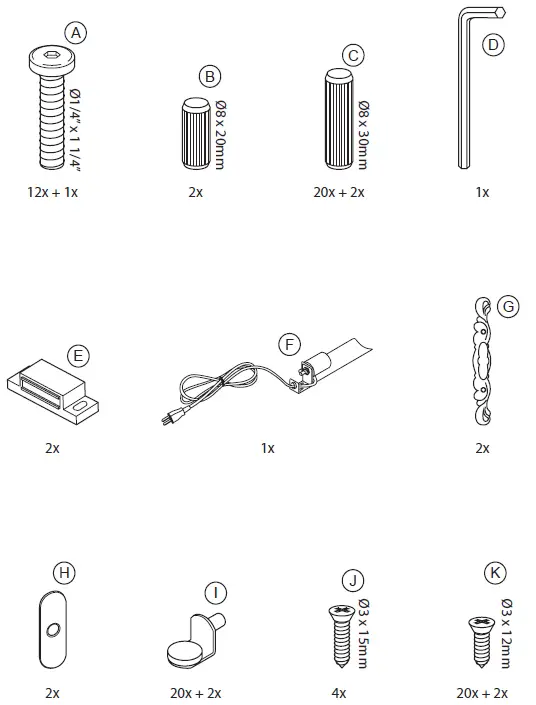
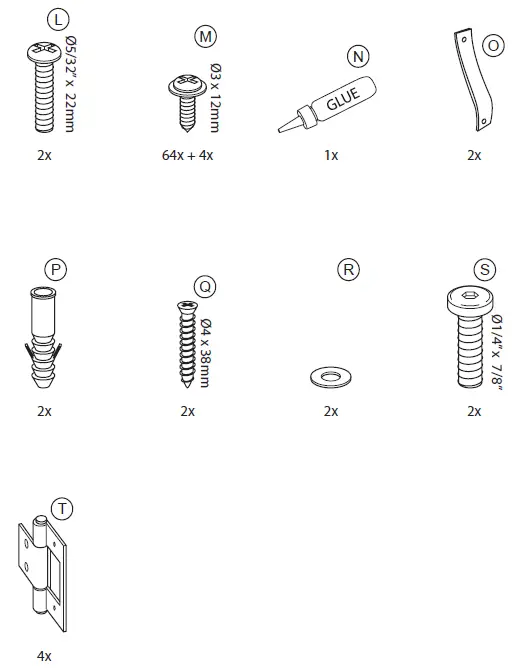
PACKAGE CONTENTS
| CODE | DESCRIPTION | QTY |
|---|---|---|
| 1 | Upper Shelf Top Panel | 1 |
| 2 | Upper Shelf Bottom Panel | 1 |
| 3 | Bottom Shelf Top Panel | 1 |
| 4 | Base | 1 |
| 5 | Left Panel | 2 |
| 6 | Right Panel | 2 |
| 7 | Support Bar | 2 |
| 8 | Back Panel | 4 |
| 9 | Cabinet Door | 2 |
| 10 | Mirror Back Panel | 4 |
| 11 | Glass Cabinet Shortage Panel | 4 |
PACKAGE CONTENTS
Install all hardware perpendicular to the opening.
Required tools for assembly (Not included)
Installation Instructions
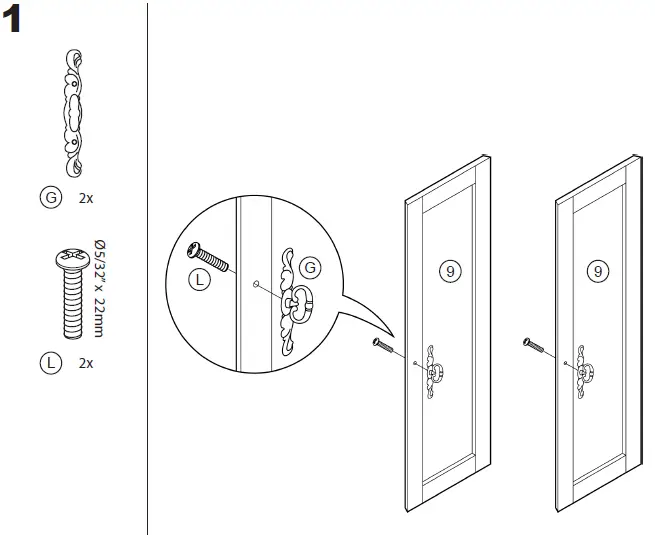
- Attach door handles to the cabinet doors (9).
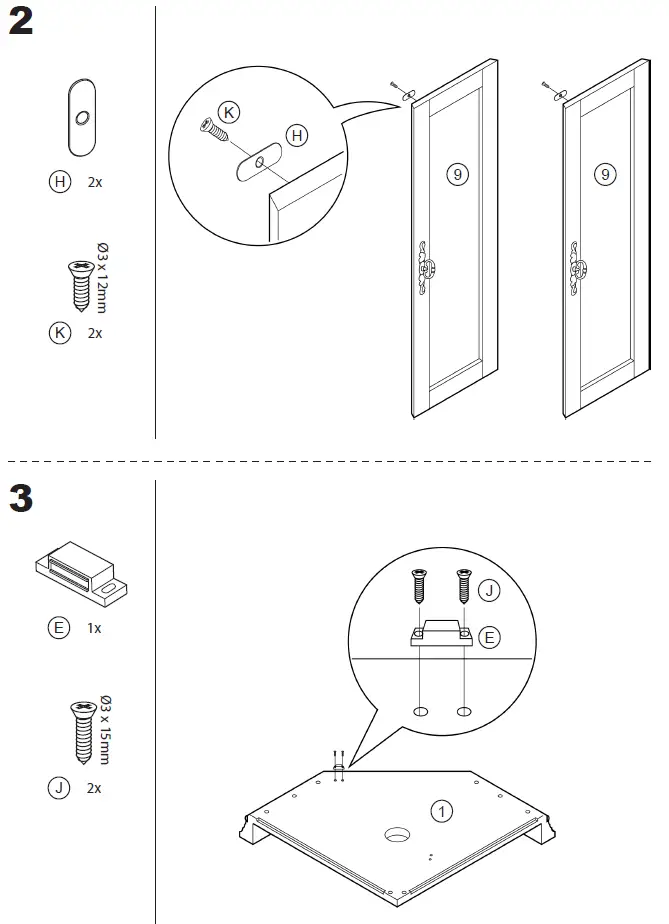
- Attach magnetic catch plates to the cabinet doors (9).
- Attach the magnetic catch to the underside of the upper shelf top panel (1).
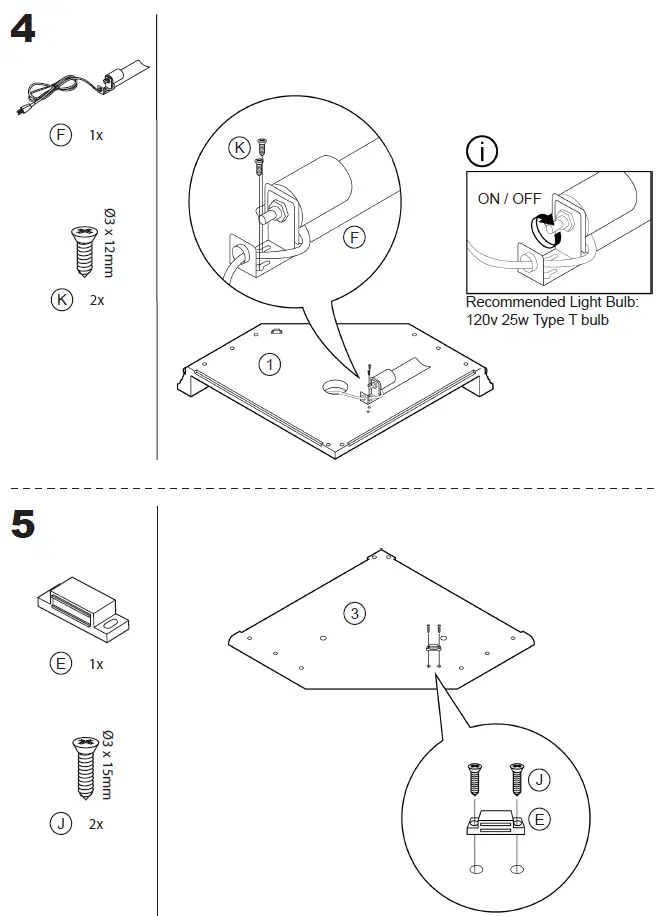
- Attach the cabinet light socket to the underside of the upper shelf top panel (1).
- Attach the magnetic catch to the underside of the bottom shelf top panel (3).
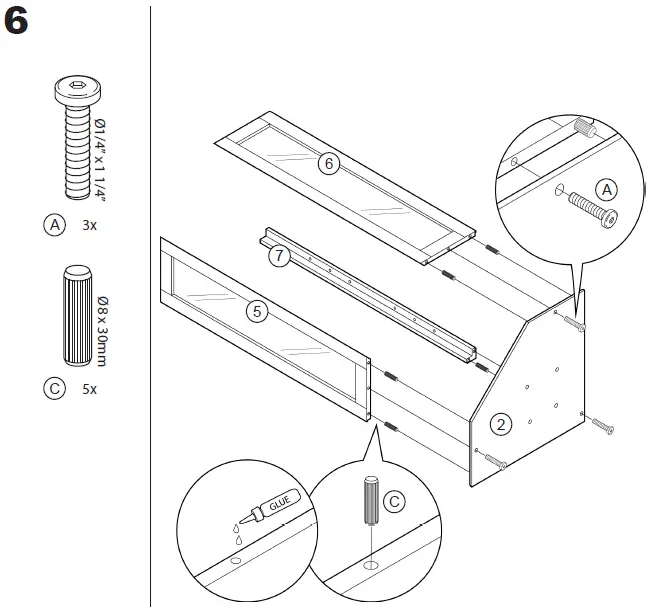
- Attach the left panel (5), right panel (6), and the support bar (7) to the upper shelf bottom panel (2).
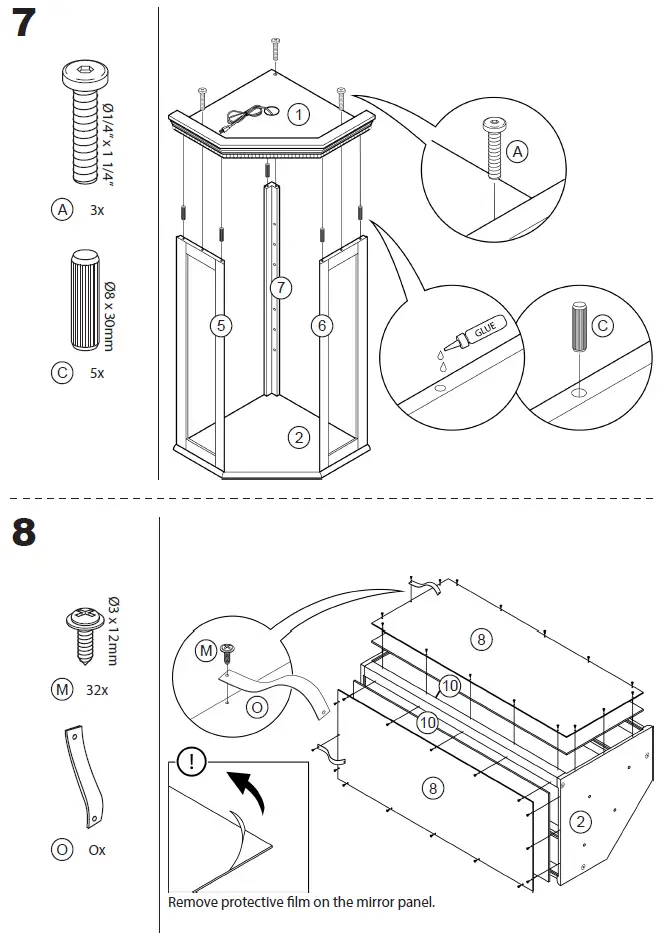
- Attach the upper shelf top panel (1) to the upper shelf assembly.
- Attach the mirror back panels (10) and the back panels (8) to the back of the upper shelf assembly. Attach anti-tipping straps to the upper shelf assembly.
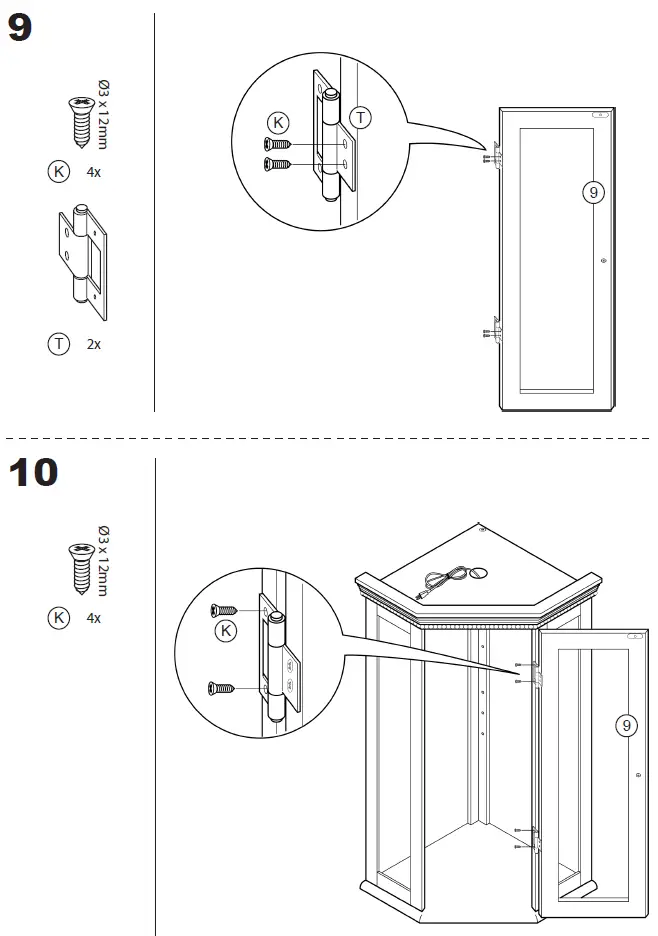
- Attach door hinges to the cabinet door (9).
- Attach the cabinet door (9) to the upper shelf assembly.
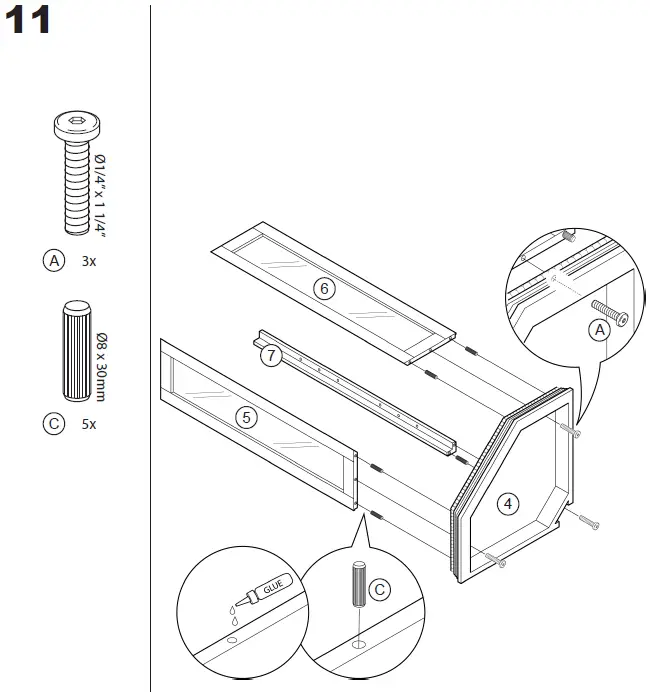
- Attach the left panel (5), right panel (6), and the support bar (7) to the base (4).
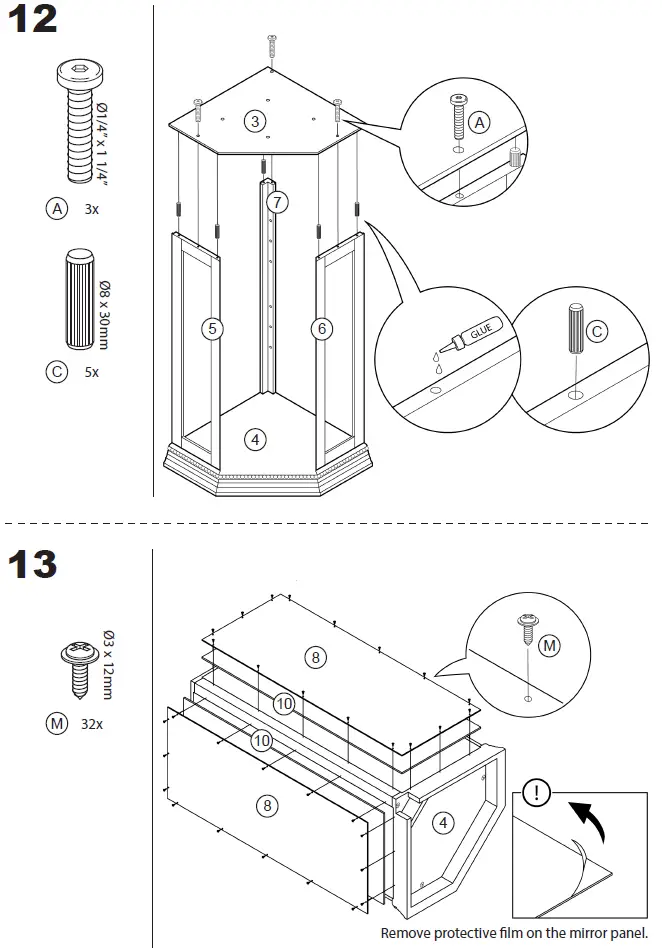
- Attach the bottom shelf top panel (3) to the bottom shelf assembly.
- Attach the mirror back panels (10) and the back panels (8) to the back of the bottom shelf assembly.
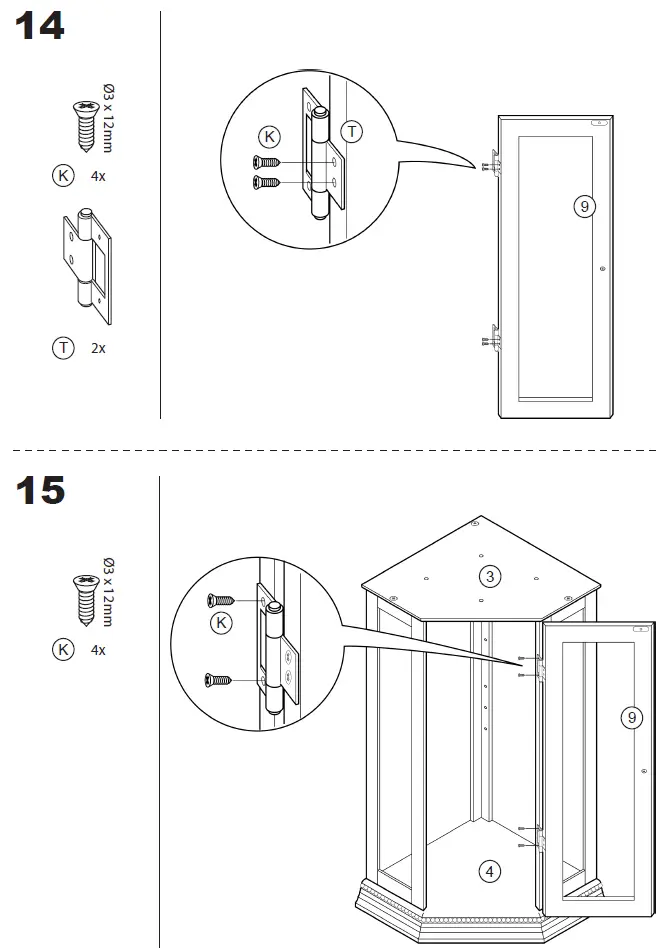
- Attach door hinges to the cabinet door (9).
- Attach the cabinet door (9) to the bottom shelf assembly.
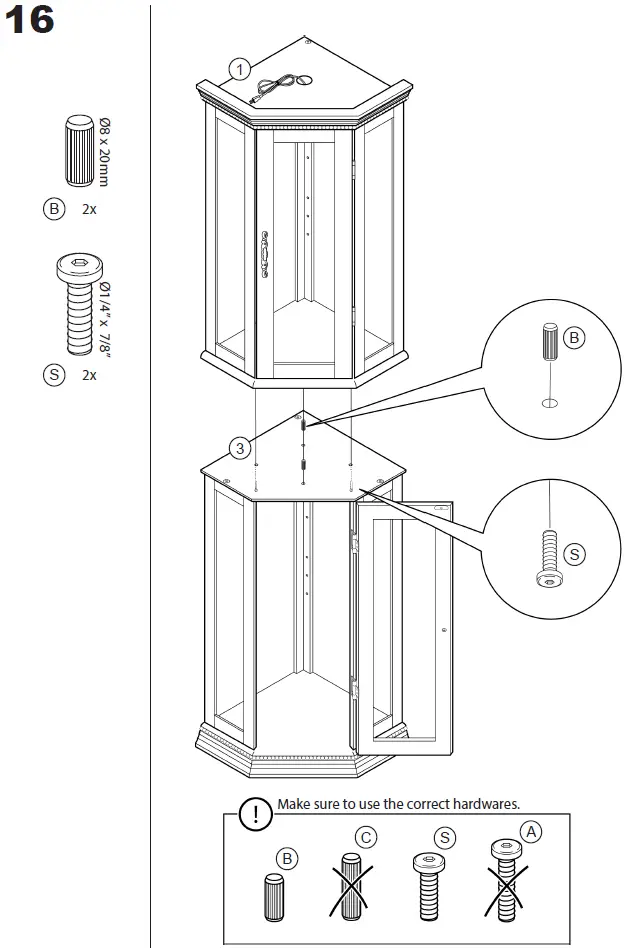
- Assemble the upper shelf assembly on top of the bottom shelf assembly.
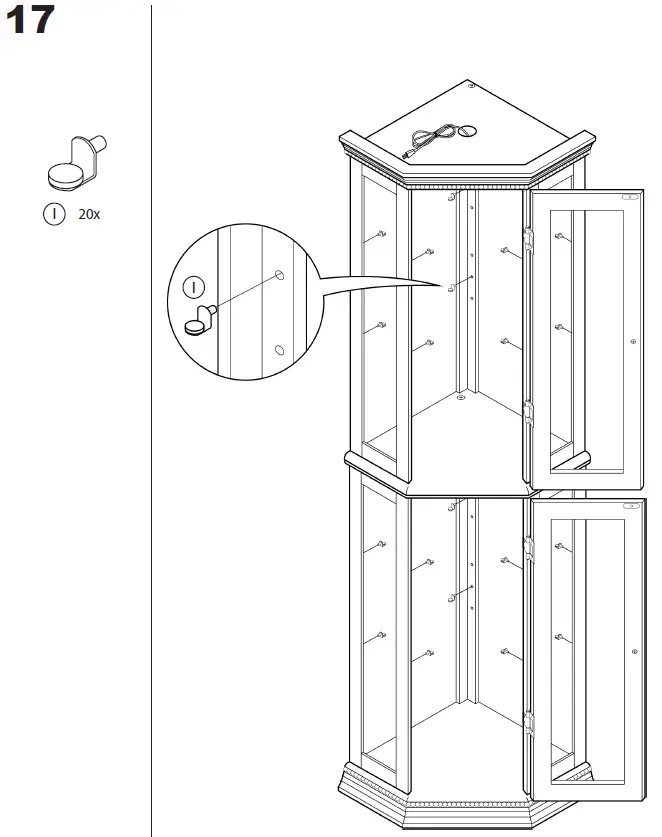
- Insert shelf pegs into the cabinet
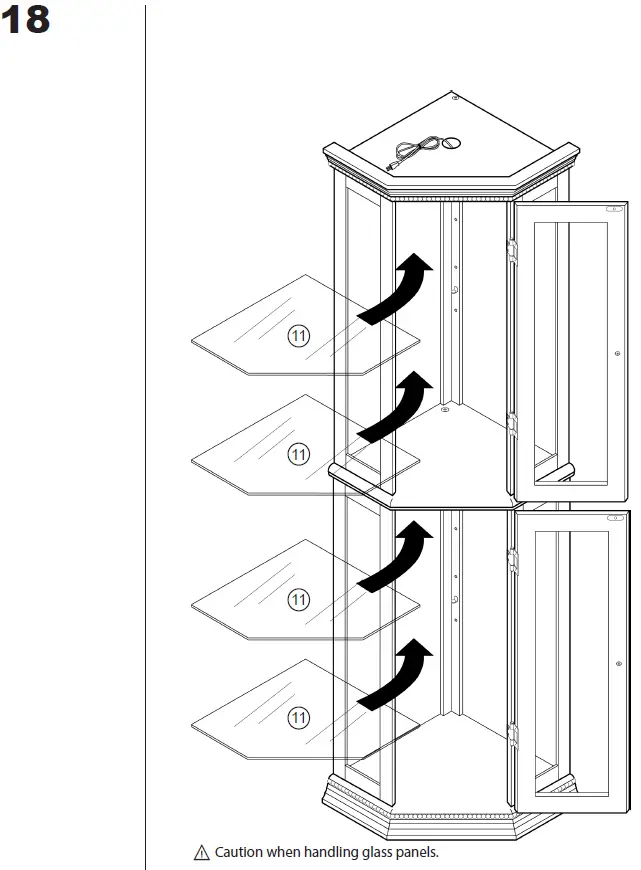
- Put glass storage shelf panels (11) inside the cabinet.
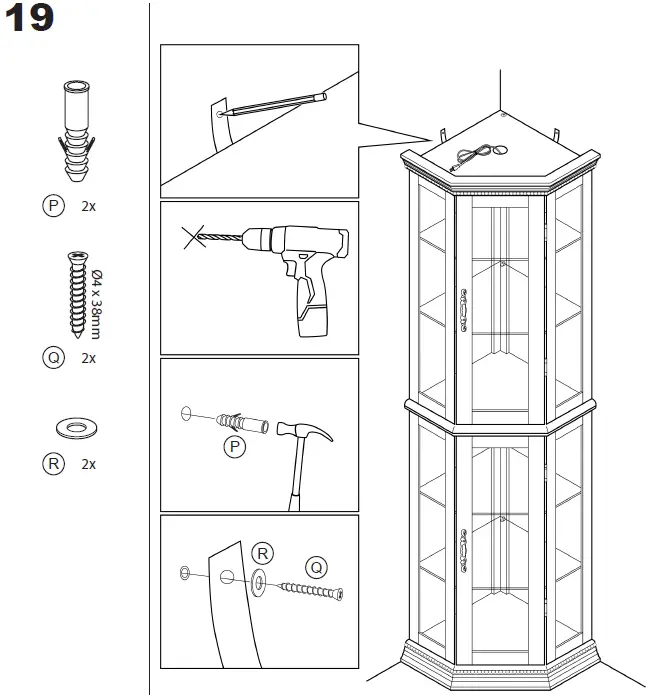
- Affix the cabinet to the wall.
Furniture must permanently fixed to the wall stud with included anti-tipping device to prevent the furniture from tipping over.
- Mark the drill position on the wall with a pencil.
- Drill a small hole on the marked position.
- Insert a wall anchor into the drilled hole.
- Fixed the anti-tipping strap to the wall with provided screws.
YOU’RE FINISHED!
Precautions
Warning
- Only place items on top of the product if they meet the recommended size and weight limits.
- Climbing on, stepping on, or placing overweighted objects on the product may cause property damage and/or injuries.
- Items placed onto this product must be resting on a support surface without hanging over the edges.
Warning
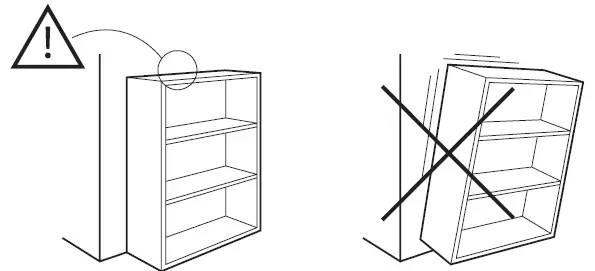
- Serious or fatal crushing injuries may occur if the furniture tip-over.
- Furniture must permanently affixed to the wall with included anti-tipping device in order to prevent the furniture from tipping over.
- Different wall materials requires different types of wall anchors or screws. Use a suitable wall anchors or screws for your specific wall in order to secure the stability and load bearing capacity of the furniture. If you are uncertain about which type of device to use, please contact us or your local hardware store.
Read User Manual Online (PDF format)
Read User Manual Online (PDF format) >>