HOLEWOR B09QKPD1BX Biometric Pistol Safe User Manual
- May 15, 2024
- HOLEWOR
Table of Contents
- Package contents
- Product diagram
- FOREWORD(Very Important):
- Unlock method
- Find the Setting button
- Password entry
- Fingerprint entry
- Delete all passwords
- Delete all fingerprints
- Time Setting
- Turn on and off the buzzer sound
- Restore factory settings
- Low battery alarm
- External Power Supply:
- Steel Cable Installation
- Warranty and Customer Service
- Read User Manual Online (PDF format)
- Download This Manual (PDF format)
HOLEWOR B09QKPD1BX Biometric Pistol Safe User Manual

Thank you for choosing the HOLEWOR biometric pistol safe. Please read the user manual carefully before use and keep this manual for future reference. If you have any questions about the use of this product, please contact us at holeworus@outlook.com.
Package contents
-
1x Pistol Safe
-
1x USB Backup power supply cable
-
2x Mechanical Keys
-
2x Long mounting screws

-
2x Short mounting screws
-
1x Silica gel dehumidifier
-
1x Gun cleaning cloth
-
4x AA batteries
-
1x Heavy steel tethering cable
Product diagram


FOREWORD(Very Important):
Regarding to the Unlock Method of the Factory Setting:
In the initial state, the battery is not installed in this safe. You need to use the equipped mechanical key to open this safe.
Opening the safe with a mechanical key
The battery compartment is inside the safe. You need to remove the battery cover and install 4 AA batteries according to the following diagram (pay attention to the positive and negative poles of the batteries).
-
Installing the battery
-
Schematic diagram of battery positive and negative poles
Note: The initial password is 000000, and pressing any fingerprint in the
Initial state cannot unlock the lock.
Do not put the key in the safe.
Unlock method
-
Mechanical key unlock
-
Fingerprint unlock

-
Password unlock

Find the Setting button
This setting button is located inside the safe, as shown in the figure. All
settings are based on this setting button, so you need to first find it.

The position of this setting button
Password entry
Short press the setting button, then press the 1 key on the numeric keypad to enter a set of 6-digit passwords. The green light on the fingerprint flashes twice and the buzzer rings once to indicate successful password entry.
-
Short press the setting button

-
Press the number 1 key
-
Enter a set of 6-digit passwords

Fingerprint entry
How to press the fingerprint correctly (As shown in the following figure) When register or recognized fingerprint , the center of the finger must place on the reader.Wiped off the dust , sweat and water on the finger , keep the finger clean, and press the finger correctly.lt is recommended to record more fingerprints,so that your fingerprint recognition will be smoother. The same finger can be register fingerprint for multiple times. And it can also register the fingerprints of multiple fingers.
Correct placement of fingerprint for registration
-
Correct placement
-
Incorrect placement
Short press the setting button, then press the 2 key on the numeric keypad, continuously press your finger three times, the fingerprint green light flashes twice, and the buzzer rings a long time to indicate successful fingerprint entry. You can enter a total of 100 fingerprints, and the more fingerprints you enter, the smoother your fingerprint recognition will be.
-
Short press the setting button

-
Press the number 2 key

-
Continuously press the fingerprint three times

Delete all passwords
Short press the settings button, then press the 3 keys on the numeric keypad. The fingerprint green light flashes twice and the buzzer rings a long time to indicate that all passwords have been successfully deleted.
-
Short press the setting button

-
Press the number 3 key
Delete all fingerprints
Short press the setting button, then press the 4 key on the numeric keypad. The green light of the fingerprint flashes twice and the buzzer rings once, indicating that all fingerprints have been successfully deleted.
-
Short press the setting button
-
Press the number 4 key
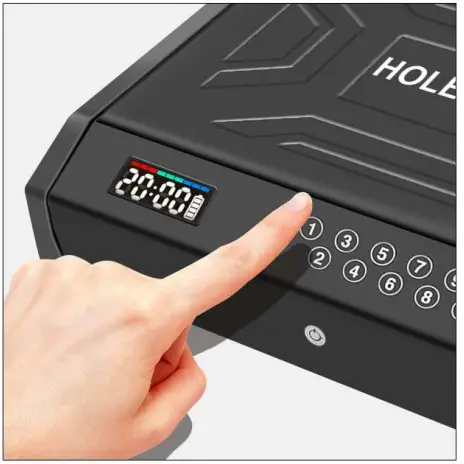
Time Setting
Short press the setting button, then press the 5 key on the numeric keypad. At this point, the numerical value on the screen will start flashing to indicate waiting for you to input the current time (24-hour system).After completing the input, briefly press the setting button again, the fingerprint green light flashes twice, and the buzzer rings once to indicate successful time setting.
-
Short press the setting button

-
Press the number 5 key

-
Enter the current time

-
Press the setting button again to save the time

Turn on and off the buzzer sound
Short press the settings button, then press the 6 key on the numeric keypad to turn on or off the buzzer sound.
-
Short press the setting button
-
Press the number 6 key
Restore factory settings
Press and hold the setting button for 5 seconds, the fingerprint green light
flashes twice, and the buzzer rings once to indicate that the factory settings
have been restored. At this time, all fingerprints and passwords are cleared,
and the initial password of 000000 is re effective.
Press and hold the setting button for 5 seconds
Low battery alarm
When the battery indicator flashes only one bar on the display screen, it
Indicates that the battery level is low and needs to be replaced in a timely
manner. Reminder: When the battery is low, fingerprints cannot be entered, but
passwords can be entered.

External Power Supply:
If the batteries become fully depleted and the mechanical keys are not available, the included USB-C cable can be connected to the port on the side of the unit to provide power to the unit for unlocking and other operations. An AC power adapter (not included) is required for this feature.

Note:
Power supplied through the USB-C port will not charge the batteries.This
feature is only used as temporary power for operation when the batteries are
depleted.
Steel Cable Installation

a. Unscrew the nut from round end
b. Wrap the steel cable around
C. Insert the round end into hole in unit
d. Tighten the nut from the inside of the unit onto the cable end a stationary object
Warranty and Customer Service
Thank you for purchasing the HOLEWOR Biometric Pistol Safe. This safe is made to ensure the greatest safety and satisfaction. Please fully read the contents of this manual and save it for future reference. If any assistance is needed, please contact us by e-mail at holeworus@outlook.com
-
0ne year warranty
The original purchaser is guaranteed for a period of one year from date of purchase against defects in material or workmanship. If any or all of the product is damaged due to defects in materials or workmanship, we will, at our own discretion repair or replace the product for the original purchaser. For warranty claims, please contact us by e-mail at holeworus@outlook.com with original order number. -
Warranty limitations
HOLEWOR is not responsible for any direct, indirect, incidental, or other losses including property damage (loss of unit or items stored in the unit), data loss, lost income, or loss of profits.
Read User Manual Online (PDF format)
Read User Manual Online (PDF format) >>