Sayorg S18 Lighter Smarter More Comfortable Wearable Breast Pump User Manual
- June 15, 2024
- Sayorg
Table of Contents
Sayorg S18 Lighter Smarter More Comfortable Wearable Breast Pump User
Manual
Lighter Smarter
More Comfortable
S18-USER MANUAL
Read this user manual carefully before using your electric breast pump, and save the user manual for future reference.
Overview
Parts list
- Silicone shield x1
- Pump motor x1
- Silicone diaphragm x1
- Type-c cable x1
- Milk collector x1
- Bra adjustment buckle x1
- Duckbill Valve x1
Control Panel
- Level down button/Mode display
- Level up button/Mode display
- Power button/Power display/Mode selection button
Note
This product has a built-in li-Ion battery. When the battery indicator lights
red, we recommend that you use a certified 5V 1A adapter to charge the pump
motor as soon as possible.
Cleaning and sterilizing
- For the first time and before each use, you must disassemble, wash and sterilize all the breast pump parts that come into contact with breast milk.
- It is recommended to use drinking water to clean the product.
- Disassemble and clean the parts in contact with breasts and breast milk immediately after use. This is to avoid bacteria growing from the residual breast milk.
Operation Cautions
- Never wash or sterilize the pump motor, which does not interact with your breast milk. You can clean it with a soft towel.
- Take care when cleaning the silicone shield and diaphragm, if it gets damaged, your breast pump will not function properly.
- When cleaning the silicone diaphram, do not rub it or insert any objects. Otherwise, it may damage.
Assembling
-
Put the silicone diaphragm into the Milk collector, and press it with your hands to make the edges fasten tightly to ensure a perfect seal.
-
Put the Silicone shield into the breast Milk collector and press it with your hands to make the edges tightly fastened. Make sure to install it in the correct direction.
-
Install the pump motor on the breast milk collector to ensure that it fits perfectly with the breast milk collector.
-
Connect the type- charging cable to charge the pump motor.
Note
The power adapter, a common standard accessory on the market, is not provided
and can be purchased separately if necessary.
Power adapter specifications: 5V 1A
TO begin pumping
-
Press the silicone shield firmly against the breast, leave no gaps and make sure your nipples are centered. Keep it upright. Please do not twist the product and the chest, otherwise the breast pump will not have sufficient power to work.
-
Long press the power button to start the breast pump.
-
Short press the” ” key to switch the working mode. When the indicator light blinks once, it enters collecting milk mode. There are 9 levels in this mode.You can press the” + “and” – ” keys to select the suction power that makes you comfortable.
Breastfeeding breasts after childbirth are prone to swelling, lumps and other breast discomfort. Using this formula can alleviate breast problems. -
Short press the ” ” key again to switch to the massage mode, The indicator light will blink once. There are 9 levels in this mode. You can select the comfortable suction power by pressing the ” + ” and ” – ” keys. In the early postpartum period, the breast duct is not easy to conduct, and the breast can be stimulated by changing the mode to promote breast milk secretion.
-
Long press the power button ” ” to turn off the breast pump.
Tips: This product has memory function. When you turn it on again, the
device will automatically return to the working mode and the suction level you
have used last time.
Relax and sit in a comfortable chair with backrest, leaning forward slightly
(use the backrest to support your back).
In this way, the silicone shield of the breast pump can be slightly inclined
upward, which facilitates the flow of breast milk into the milk collector and
reduces the residual breast milk in the silicone shield.
- After pumping, press the power button to turn off the breast pump, lean forward slightly, and then carefully remove the breast pump from the breast. If there is a small amount of breast milk remaining at the silicone shield, you can tilt the breast pump slightly to pour the remaining breast milk from the silicone shield.
Duckbill Valve Installation Instructions
Insert the raised part of the duckbill valve into the round hole at the bottom of the suction bowl groove of the bra.

Instructions for bra adjusting buckle
Adjust the length of the bra straps to increase pumping comfort. Hang one end of the adjustment buckle on the breastfeeding buckle of the bra lining, and hang the breastfeeding buckle of the bra on the other end of the adjustment buckle to adjust the length of the bra straps.
Instructions for pouring milk
After finishing pumping,please remove the breast pump from your breast. Next, keep breast pump upright and remove the pump motor. Then hold the milk collector to pour milk into the bottle. So as to prevent breast milk spilled, ensure the groove part of milk collector is aligned with the mouth of bottle.

Storing your breast milk
Storing breast milk
- Only store breast milk collected by sterilized breast pumps.
- The milk that is collected can be placed in a clean and sterilized storage bag or a milk bottle with a sealing cushion, and then immeidately put in the refrigerator.
Refrigerating breast milk
- Do not freeze breast milk repeatedly.
- Do not mix fresh breast milk with frozen breast milk.
- Be sure to discard the breast milk left after feeding.
- The extracted milk can be refrigerated in the refrigerator for 48 hours (inside the refrigerator), or frozen in the freezer for three months, and the milk bottle or milk storage bag can be affixed with a label clearly marking the milking date and time.
Unfreeze breast milk
Place the frozen breast milk in the refrigerator compartment for one night to thaw. In an emergency, you can use a bowl of hot water to thaw breast milk. After thawing breast milk, it must be consumed within 24 hours.
Heating breast milk
- Erect the baby bottle in a bowl of hot water or heat the breast milk safely and quickly with a food warmer.
- Keep in mind that check the temperature of breast milk before feeding your baby.
- Do not use a microwave oven to heat breast milk, because this may destroy important nutrients and antibodies.
- In addition, uneven heating may cause partial overheating of the liquid, which may cause scalds.
- Do not immerse the milk storage bottle in boiling water to heat, which may cause rupture or crack.
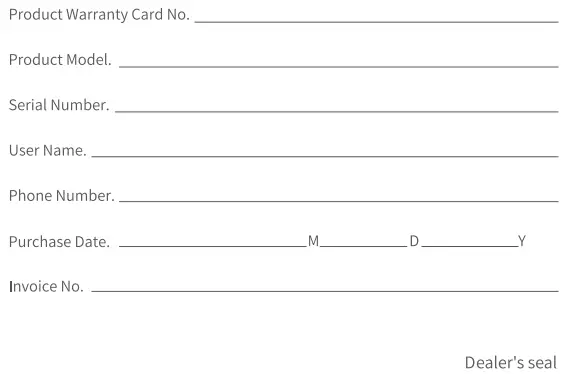
Warranty
Warranty Card
mykitor.com
+1 213-495-1792
Read User Manual Online (PDF format)
Read User Manual Online (PDF format) >>